This is a fairly common issue that happens randomly on WordPress websites which has the catastrophic impact of bringing the entire website offline resulting in users seeing the error whenever they try and load a page on the website.
This can feel quite daunting when you first see this error, but don’t worry as there is a methodical process to solving this issue. As with many things with WordPress, there are many different root causes of these kinds of issues, so it’s simply a case of debugging things to identify what is causing the issue which will allow you to identify the next steps to solve the issue.
The common root causes of the “Error establishing a database connection” on WordPress can be;
Incorrect database connection details in your /wp-config.php file (unlikely if you haven’t actively changed this recently – more common for new manual installations of WordPress)
Corrupt Plugin files which can often occur after recent updates to Plugins
Corrupt database table(s) which need repairing
So let’s look at how to debug each of the common problems.
Check Database Connection Details
Simply open your /wp-config.php file and confirm that the details are correct for the following settings;
define(‘DB_NAME’, ‘your_database_name’);
define(‘DB_USER’, ‘your_database_username’);
define(‘DB_PASSWORD’, ‘your_database_password’);
define(‘DB_HOST’, ‘localhost’);
Unless you’ve recently changed these settings between the last time the website was working and the time you are seeing the “Error establishing a database connection” error appeared, then it is unlikely that this is the root cause of the issue.
Check for Corrupt Plugin Files
Whether you are manually updating your Plugins or you have these configured to automatically update (which is highly recommended) both failed or successful Plugin updates can result in this error showing. To quickly debug this, simply rename the /wp-content/plugins folder to /wp-content/plugins-disabled
When WordPress cannot find a Plugins folder it simply disables all plugins from running whenever you load a page on your website. So this is a quick test where you can simply rename the folder, then try refreshing the website again to see if the error has disappeared.
If that has solved the problem, then you simply need to rename the folder back to it’s original name, then methodically disable one plugin at a time by repeating that same process on the sub-folders for the individual Plugins to determine which plugin is causing the issue.
Repair Corrupt Database Tables
This one is a little more challenging to debug manually, but thankfully recent versions of WordPress have a handy tool to identify issues and try and automatically fix the problem.
Firstly, you need to edit your wp-config.php file and add the following line in;
define(‘WP_ALLOW_REPAIR’, true);
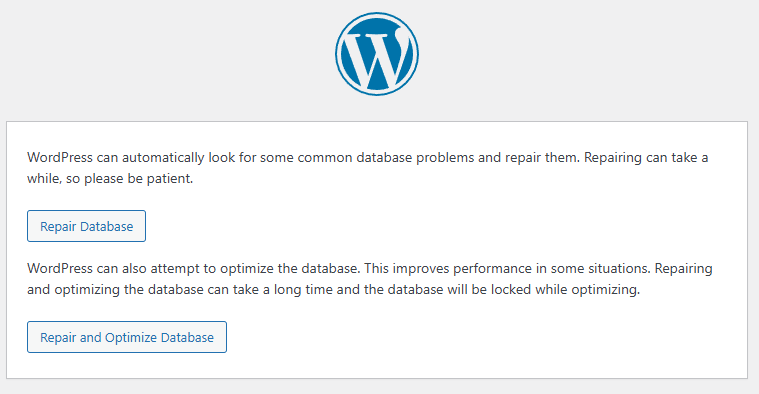
Once that setting is turned on, you can visit https://example.com/wp-admin/maint/repair.php (naturally replacing the domain name with the one you are working on)
You may see a page similar to the above or one full of errors and database tables – either way, you will see the options to either;
Repair Database
Repair and Optimize Database
So give those a go.
All being well, this will solve the issue and your website will be back online.
There are also a few other handy debugging steps related to this such as if you’re running phpMyAdmin then you will probably notice that the table appears locked and will often say that the table is “in use” which is a strong indicator that there is an issue.
It is possible to fix this issue via phpMyAdmin by selecting the table and selecting the option to Repair Table which effectively does the same thing the above automated process has done.
And if you’re running on cPanel, then it’s handy to view the cPanel error log for the specific cPanel account by running the command via SSH;
cd /home/cpanel-account-username/public_html
tail error_log
Which will output any errors that the site is having. It’s important to note that for this step to work, you must have your WordPress error logs turned on in your wp-config.php file and must have loaded the page again so the errors actually get written to the log.
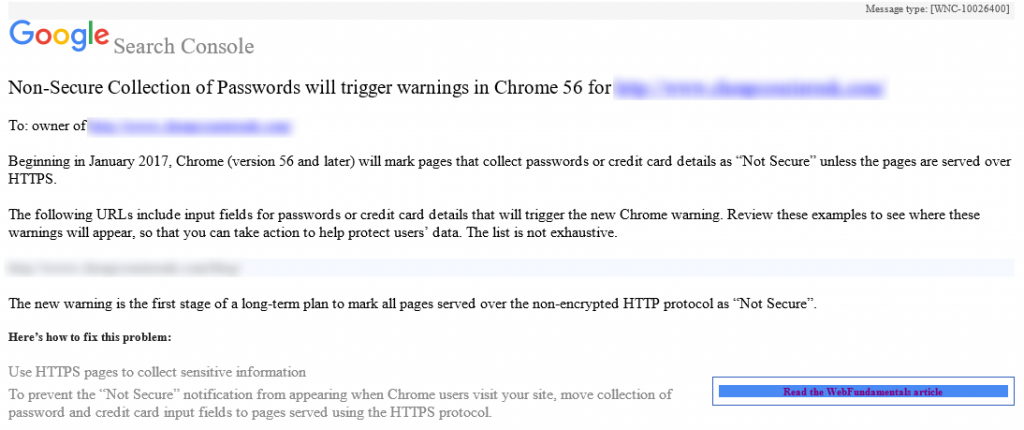
You may have recently received an email from Google Search Console warning you that your website is being flagged as Non-Secure Collection of Passwords as can be seen below;
If you have been sent a message like this, you need to act before it is too late. You have received this message because your website is running over HTTP instead of HTTPS on pages that you collect sensitive information. Whenever either you or your users enter sensitive information on any website using HTTP, i.e. http://www.contradodigital.com/wp-login.php then this information can be seen in transit by anyone listening in on the network.
What you need to do
The solution to resolving these warnings is actually relatively simple. If you want to have a go at this yourself, then make sure you claim your free SSL certificate and update your website accordingly. If you need any help implementing this then get in touch and we can help you with the process.
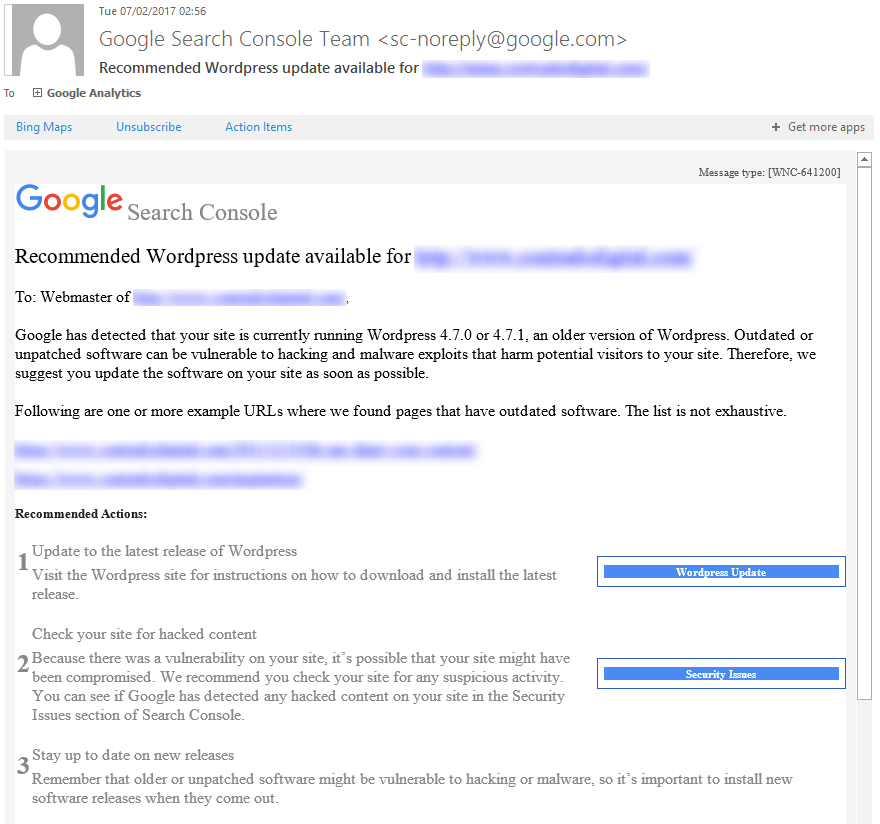
Google Search Console, formerly called Google Webmaster Tools, has started to inform WordPress website owners when security updates are available. This is a great effort by Google to help website owners and businesses keep their websites safe and secure with regular WordPress security maintenance.
While this is a great step forward, as a business owner you must not wait until you see these kinds of messages from Google until you take action to update your WordPress website. These messages are purely focused at the WordPress Core files, which is only a small part of WordPress security. If you think of security like you would with a building, imagine WordPress Core files being your front door. Just because your front door is locked, it doesn’t mean that you haven’t left your windows, back doors, side doors and garage unlocked and open. It is the same concept with WordPress security. You must be taking proactive measures to protect your website against hackers.
If you aren’t sure how to go about dealing with WordPress security, then fear not, drop us an email and we can talk you through the options available.
WordPress 4.7.2 is now available. This is a security release for all previous versions and we strongly encourage you to update your sites immediately. If you are unsure how to deal with WordPress security updates, get in touch and we can manage your WordPress security updates for you.
WordPress versions 4.7.1 and earlier are affected by three security issues:
The user interface for assigning taxonomy terms in Press This is shown to users who do not have permissions to use it. Reported by David Herrera of Alley Interactive.
WP_Query is vulnerable to a SQL injection (SQLi) when passing unsafe data. WordPress core is not directly vulnerable to this issue, but we’ve added hardening to prevent plugins and themes from accidentally causing a vulnerability. Reported by Mo Jangda (batmoo).
A cross-site scripting (XSS) vulnerability was discovered in the posts list table. Reported by Ian Dunn of the WordPress Security Team.
An unauthenticated privilege escalation vulnerability was discovered in a REST API endpoint. Reported by Marc-Alexandre Montpas of Sucuri Security. *
Download WordPress 4.7.2 or venture over to Dashboard → Updates and simply click “Update Now.” Sites that support automatic background updates are already beginning to update to WordPress 4.7.2.
Thanks to everyone who contributed to 4.7.2.
* Update: An additional serious vulnerability was fixed in this release and public disclosure was delayed. For more information on this vulnerability, additional mitigation steps taken, and an explanation for why disclosure was delayed, please read Disclosure of Additional Security Fix in WordPress 4.7.2.
It’s taken a good few months of organising everything in the background and we’re finally here. Blackburn WordPress User Group, BeeWUG is now officially starting which will be running on the first Wednesday evening every month in…. Blackburn at the College who are kindly supporting the local WordPress community.
BeeWUG is a free community event open to everyone wanting to learn more about WordPress. Whether you have an interest in WordPress, are using WordPress professionally or just want to come along and meet some great people, get involved. Look forward to seeing you there.
We recently wrote about how awesome the new Accelerated Mobile Pages (AMP) technology is for improving page load times on your website. Well, yes it is, but something to bear in mind that we’ve just come across. Google recently wrote a blog post about how to set up Analytics on your AMP pages only 4 days ago, which quite frankly is a little slow since we’ve been using AMP technology for well over 4 months now and it has never been on our radar that this wouldn’t be tracked by default out of the box. Anyway, we’ll let this one slip.
The crooks of it though is that you’re probably not including tracking on any of these AMP pages that you’ve implemented which is a tad annoying. From a WordPress perspective, make sure you’re using the AMP Analytics plugin which will add Google Analytics tracking to your AMP pages when they are loaded by web browsers and Google. You could be missing out on a significant amount of tracking data when tracking the performance of your campaigns. For anything non-WordPress related, you’ll have to get into the tech to implement this manually within your web application which is certainly going to be a tad more time consuming. Drop us an email if you need any help with getting this set up on your own websites and web applications.