This is a super simple guide for anyone getting started. Often things are very complex, but when you’re just dipping your toes in the water, it helps when there are simple guides to follow along with. So this is it, how to get started with building your first website using HTML.
What You’ll Need
Very little;
- Notepad, which comes pre-installed on Windows computers
- Web Browser (Chrome, Edge, Firefox – whatever your preference)
That’s it!
What is HTML
In simple terms, it’s just a structured language that your web browser can interpret and translate that text into a website that you are familiar with using.
Getting Started – Let’s Build Your First Website Using HTML
Firstly, open Notepad and copy and paste this text into it;
<html>
  <head>
    <title>My First Website!</title>
  </head>
  <body>
    <h1>My First Website!</h1>
    <p>{Insert some witty text here...}</p>
  </body>
</html>
Now simply save your file as MyFirstWebsite.html
Done. That’s it. You have just built your first website! There is nothing more to it.
Load Your First Website in Your Web Browser
Now simply find the file your just saved, double click it and it will open in your web browser.
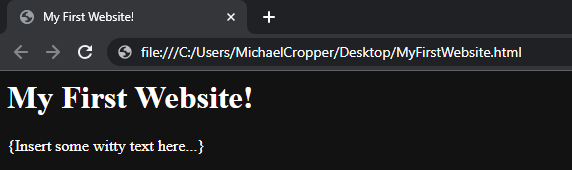
Granted, your website looks awful, and only you can access it so it’s not much use right now, but we’ll cover that off another time.
Understanding HTML – Structure
HTML is based on XML, which is just a nested structure of data. A bit like a Russian Doll, just a bit more complex. You Open something, and Close something, which contains that bit of information like a simplified instruction manual containing relevant information that can be processed easily by your web browser.
Understanding HTML – Elements (also referred to as Tags) and Attributes
Elements are the bits in between the chevrons <this-bit>, so in the above example we have used the following Elements;
- html = Container of all information, basically an outside wrapper to all the information
- head = Important stuff generally goes in here and isn’t visible to the user
- title = Exception to the rule stated in #2, as this is the bit that shows in your web browsers tab
- body = Where all the information generally goes that you want to display to your users in the web browser
- h1 = Headings. Can use h1 through to h7. Think of these like headings in a book. H1 may be used for Chapter Titles, H2 may be used for Sub-Headings in a Chapter etc.
- p = Used for general text
Attributes are what bring Elements to life. Every Element can have different Attributes depending on what it is and what it is capable of. But for a simple example, you may want to colour something in and in which case you would tweak the code as follows;
<h1 style="color:green;">My First Website!</h1>
Which then simply does exactly as you would expect;
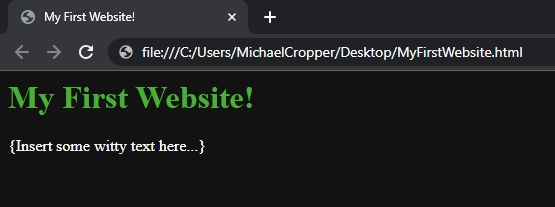
There are better ways of doing this, by using External CSS Stylesheets but that’s something to cover off another time.
Make it Look Sexy
As someone I once worked with said, “Now it’s just time to make it look sexy…” 🙂
So have a play with the different HTML Elements and HTML Attributes and see what you can do. Everything else from this point is all about displaying things well for users.
For a Full List of HTML Elements, check the link at W3 Schools
For a Full List of HTML Attributes, check the link at W3 Schools
This will only get you so far, beyond the basics, you’ll find it still looks pretty awful and like a website from the 1990s.
This is where CSS comes into play.
Make it Look Sexy with CSS
CSS. aka. Cascading Style Sheets. Ignore the name, it’s simply a way of making things look sexy. In the same way that HTML is designed to structure content on a web page.
We used a bit of CSS already in the previous example when we used the style Attribute. That’s what is known as In-Line CSS. You simply separate each of the bits of data using a ; symbol.
The better way of doing this though is using an External .css file, but we’ll not go into the details of that just yet as that is a bit more complex.
For a Full Guide to using CSS, see this guide from W3 Schools
Make Your Life Easier with Bootstrap
Once you’ve had a play around with this stuff manually, read up on Bootstrap. It is a framework that does a lot of “making it sexy” for you with loads of handy helper functions so you don’t have to go messing around with CSS to get something to work in a very specific way.
See here for the Official Bootstrap website: https://getbootstrap.com/
See here for a handy Bootstrap Version 5 (current version at time of writing) from W3 Schools
To put the importance of Bootstrap into context, let’s look at these two examples both of which produce a basic button Element;

Which was generated with this code;
<button>My Button</button>
To be fair, that button doesn’t actually look awful. I had in my mind what these buttons used to look like years ago but seems modern web browsers have actually come a long way to making things look much nicer by default.
Looking at Bootstrap, here’s what the Bootstrap code looks like (note, this code won’t directly work if you copy and paste as it’s dependent on importing an external library – read more on those earlier links for info if you want to test this);
<button class="btn btn-success">My Button</button>
Which looks like this;

The actual CSS behind these abstracted classes called btn and btn-success (don’t ask me why Button has been abbreviated to btn, developers tend to like to add lots of unnecessary complexity and quirky naming conventions everywhere just to confuse people. It’s a pet hate of mine!), are doing all this work under the hood;
element.style {
}
.btn:not(:disabled):not(.disabled) {
    cursor: pointer;
}
[type=button]:not(:disabled), [type=reset]:not(:disabled), [type=submit]:not(:disabled), button:not(:disabled) {
    cursor: pointer;
}
.btn-success {
    color: #fff;
    background-color: #28a745;
    border-color: #28a745;
}
.btn {
    display: inline-block;
    font-weight: 400;
    text-align: center;
    white-space: nowrap;
    vertical-align: middle;
    -webkit-user-select: none;
    -moz-user-select: none;
    -ms-user-select: none;
    user-select: none;
    border: 1px solid transparent;
    padding: 0.375rem 0.75rem;
    font-size: 1rem;
    line-height: 1.5;
    border-radius: 0.25rem;
    transition: color .15s ease-in-out,background-color .15s ease-in-out,border-color .15s ease-in-out,box-shadow .15s ease-in-out;
}
.btn-success {
    color: #fff;
    background-color: darkgreen;
    border-color: darkgreen;
}
.btn-success {
    color: #fff;
    background-color: #198754;
    border-color: #198754;
}
.btn {
    display: inline-block;
    font-weight: 400;
    line-height: 1.5;
    color: #212529;
    text-align: center;
    text-decoration: none;
    vertical-align: middle;
    cursor: pointer;
    -webkit-user-select: none;
    -moz-user-select: none;
    user-select: none;
    background-color: transparent;
    border: 1px solid transparent;
    padding: 0.375rem 0.75rem;
    font-size: 1rem;
    border-radius: 0.25rem;
    transition: color .15s ease-in-out,background-color .15s ease-in-out,border-color .15s ease-in-out,box-shadow .15s ease-in-out;
}
[type=reset], [type=submit], button, html [type=button] {
    -webkit-appearance: button;
}
button, select {
    text-transform: none;
}
button, input {
    overflow: visible;
}
button, input, optgroup, select, textarea {
    margin: 0;
    font-family: inherit;
    font-size: inherit;
    line-height: inherit;
}
button {
    border-radius: 0;
}
[type=button], [type=reset], [type=submit], button {
    -webkit-appearance: button;
}
button, select {
    text-transform: none;
}
button, input, optgroup, select, textarea {
    margin: 0;
    font-family: inherit;
    font-size: inherit;
    line-height: inherit;
}
button {
    border-radius: 0;
}
*, ::after, ::before {
    box-sizing: border-box;
}
*, ::after, ::before {
    box-sizing: border-box;
}
user agent stylesheet
button {
    appearance: auto;
    font-style: ;
    font-variant-ligatures: ;
    font-variant-caps: ;
    font-variant-numeric: ;
    font-variant-east-asian: ;
    font-variant-alternates: ;
    font-variant-position: ;
    font-weight: ;
    font-stretch: ;
    font-size: ;
    font-family: ;
    font-optical-sizing: ;
    font-kerning: ;
    font-feature-settings: ;
    font-variation-settings: ;
    text-rendering: auto;
    color: buttontext;
    letter-spacing: normal;
    word-spacing: normal;
    line-height: normal;
    text-transform: none;
    text-indent: 0px;
    text-shadow: none;
    display: inline-block;
    text-align: center;
    align-items: flex-start;
    cursor: default;
    box-sizing: border-box;
    background-color: buttonface;
    writing-mode: horizontal-tb !important;
    margin: 0em;
    padding-block: 1px;
    padding-inline: 6px;
    border-width: 2px;
    border-style: outset;
    border-color: buttonborder;
    border-image: initial;
}
I’m sure I know which one of these two code examples you would prefer to be using….
Abstraction within software engineering is one of those things that is all designed to make life as easy as possible. Not all abstraction is good, but at least in this case you can see a real example of how this kind of abstraction really does help simplify things when making things look sexy.
Making Things Interactive using JavaScript
This is beyond the scope of this post, but just including the basic terminology. HTML, CSS, JavaScript.
Deploying Your Website
This is an enormous topic so is well outside of the scope of this blog post. There are endless different ways of doing this but you need to understand a LOT of information to achieve this, and a LOT of technically complex information. HTML, CSS and JavaScript are the equivalent of Nursery when it comes to your journey.
Next Steps
We’ll do a deeper dive on CSS and JavaScript in other future posts. These three are the foundational technologies used for every website on the planet.
Websites using purely these technologies tend to be referred to as Static Websites, because they don’t change a great deal.
Websites using Databases in the background to power the website tend to be referred to as Dynamic Websites.
Not really sure if those terms are really used these days any more if I’m honest as pretty much everything of any material importance is generally driven by a database under the hood in one way or another. But just mentioning for reference as your reading will probably come across some of these terms.
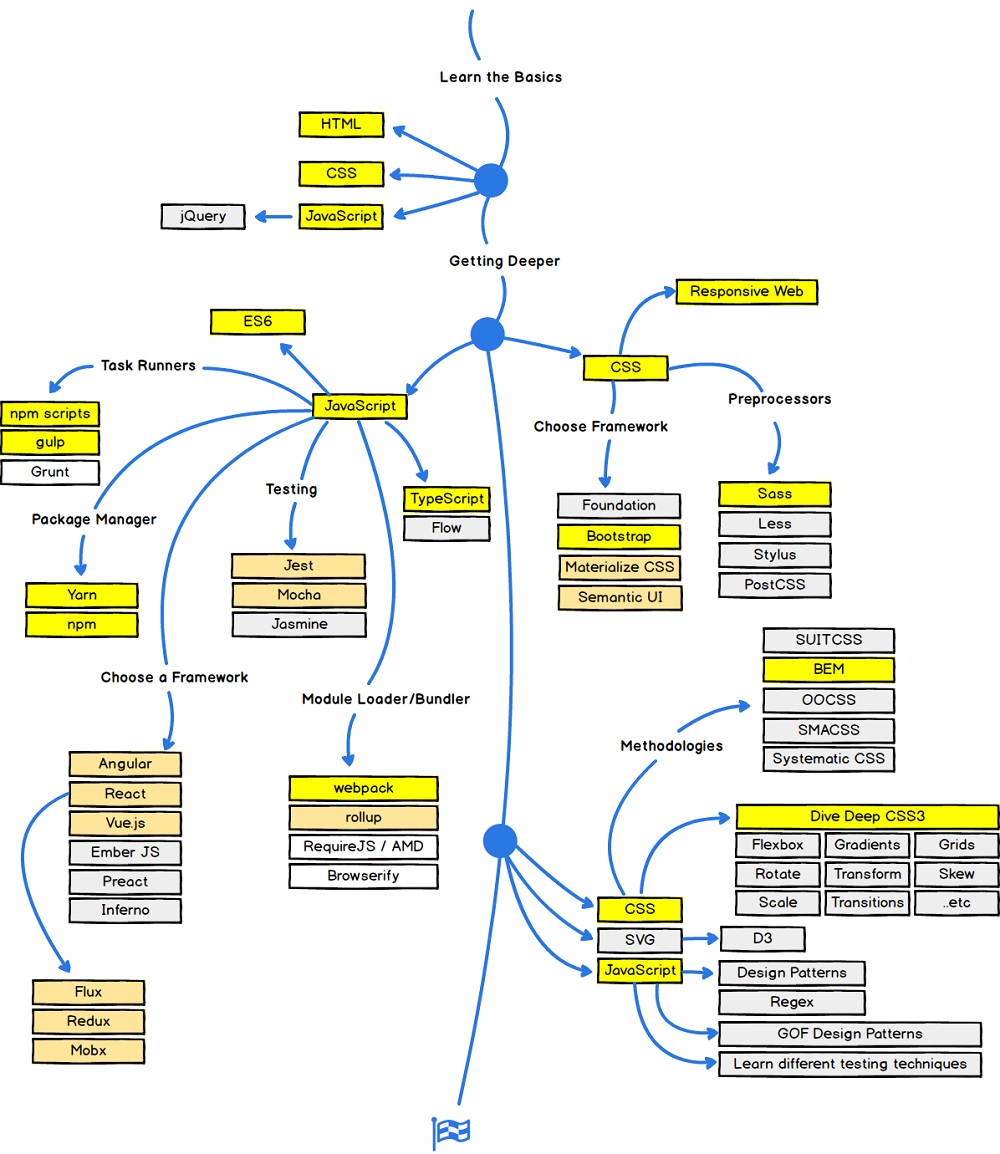
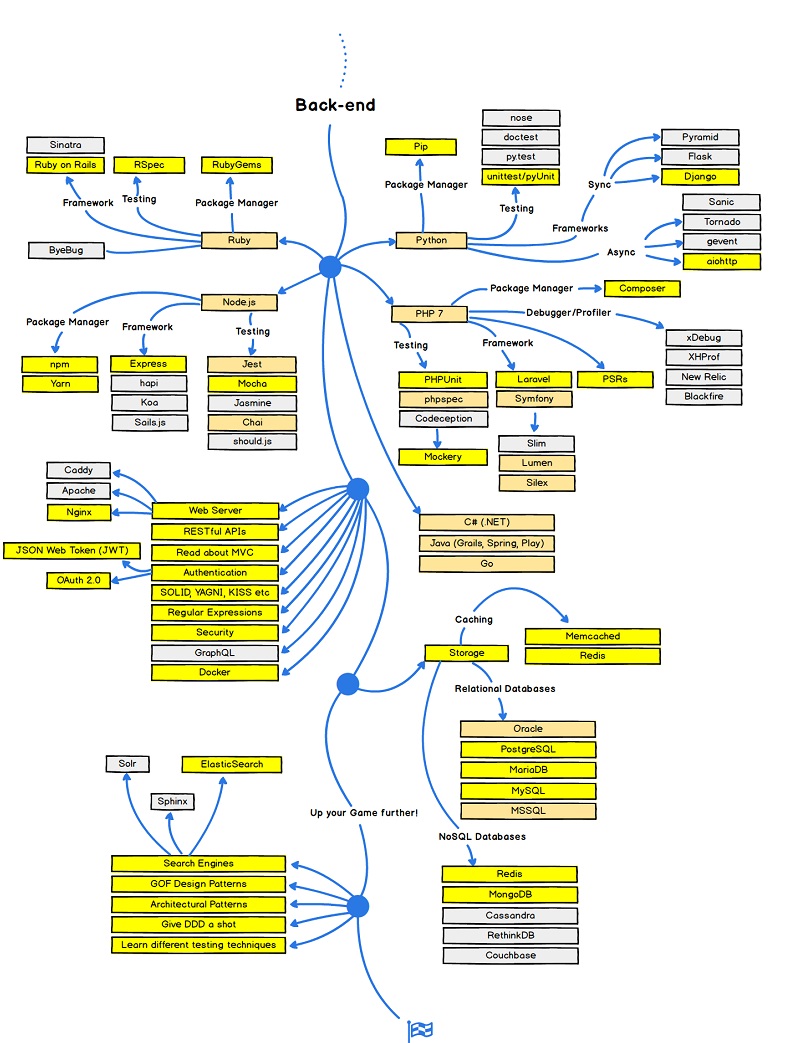
Technology such as HTML, CSS and JavaScript also tend to be referred to as Front End Technologies, and other technologies tend to be referred to as Back End Technologies. There is a bit more nuance to this these days, as JavaScript these days has kind of morphed into a one-tool-to-solve-all-problems, but that’s another rant for another day.
These diagrams from W3 Schools are quite handy to understand the journey ahead.
Summary
So there you go, that’s how easy it is to build your first website. Yes, it basically has no functionality and is a glorified poster of static information that only you can see, but that’s the basics. We’ll cover off some more of the other topics in the future.
Go and have a play with seeing how far you can get with building this out into something of use. You’ll soon see the limitations of purely using these technologies.
And to prepare you for the journey ahead, the learning curve from this point forward is extremely steep. But don’t let that put you off. The future is digital, and these kinds of skills are invaluable for almost every part of your daily life both personally and professionally over the next 50 years and beyond. AI is never going to replace the need for these kinds of skills, after all, all AI is built by humans. Remember that.