by Michael Cropper | May 11, 2016 | Client Friendly, Security |
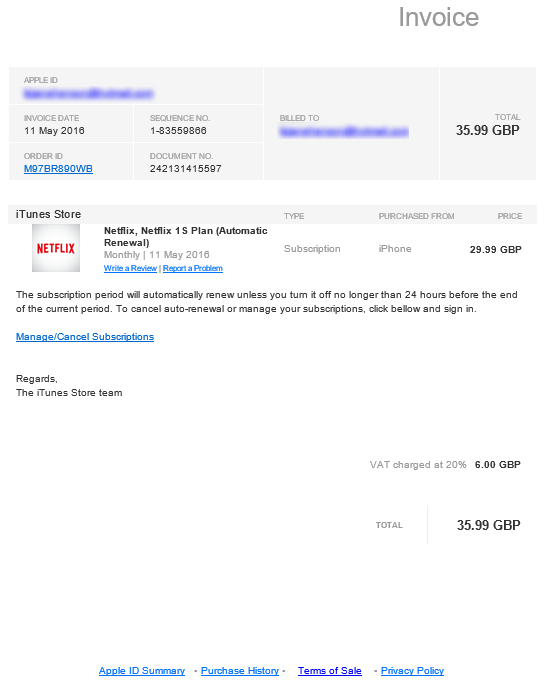
Another scam email to be aware of if you receive something similar. You can tell the email is a scam by hovering over, not clicking, on one of the links in the email, it doesn’t link to Apple. If you are ever in any doubt, always make sure you open the website in question in your browser by typing in the address, never click on any links in the emails. For any services like this, you will have a notification waiting in your account if this is genuine.
by Michael Cropper | May 9, 2016 | Developer, Technical, WordPress |
Accelerated Mobile Pages, AMP for short, is an open source project designed to make the web faster. For people accessing web content on mobile devices, speed is a challenge for many users and with over 50% of content accessed on the web via mobile devices, this is more important now than ever.
The concept of Accelerated Mobile Pages is all about stripping out irrelevant styling and fancy JavaScript technologies to make the page load much faster, with the most important aspect, the content, loading virtually instantly.
If you’re interested in the finer details behind the project, have a read all about it here, https://www.ampproject.org/. The technical aspects behind the project are quite significant as are the underlying details about how your web browser loads content as standard.
Accelerated Mobile Pages AMP Speed Test
So we thought we’d put AMP to the test to see just how much faster it really is for WordPress in comparison to a rather bloated website which requires a bit of TLC, like most WordPress websites on the whole. The results below we repeated on the same website multiple times and cannot believe the performance increases we saw. The Accelerated Mobile Pages plugin for WordPress is available for download from the WordPress repository. A note on the plugin at the time of writing, it only supports Posts in WordPress, i.e. your blog posts. Pages and Ecommerce Products aren’t supported currently.
Blog Post Loaded As Normal

Blog Post Loaded with Accelerated Mobile Pages APM Technology

Awesome! Try loading this page you are viewing now as an Accelerated Mobile Page here to see how this looks: https://www.contradodigital.com/2016/05/09/wordpress-accelerated-mobile-pages-amp-speed-test/amp/
As a footnote. Yes, 30 seconds is darn slow for a website to fully load. Yes, tools like Pingdom are not perfect as many users are more interested in the time when the website appears to have completed to load opposed to when the last byte has arrived. And yes, this is only a single site as a comparison. Get involved and give this a go on your own website to see how this performs for you. Every website is significantly different and ever web server has been configured differently based on your individual needs.
by Michael Cropper | May 9, 2016 | Developer, Security, Technical |
Just like the computer that you are reading this blog post on, your web server has a lot of software installed to keep it running. And like all software, it needs to be kept up to date to avoid security issues. Web server security is an enormous topic with many moving parts, many which are often uncomprehendable to the non-teckie.
Seriously though who is updating your web server software?
Your web developer? Unlikely, often web developers have very limited knowledge of the underlying technologies of web servers.
Your web hosting company? Possibly, but unlikely unless you’re paying them to do so.
Your IT team? Unlikely, your IT team is often focused around the computers, laptops and devices around the office and often believe that it is the web developer’s or web hosting company’s job to do this.
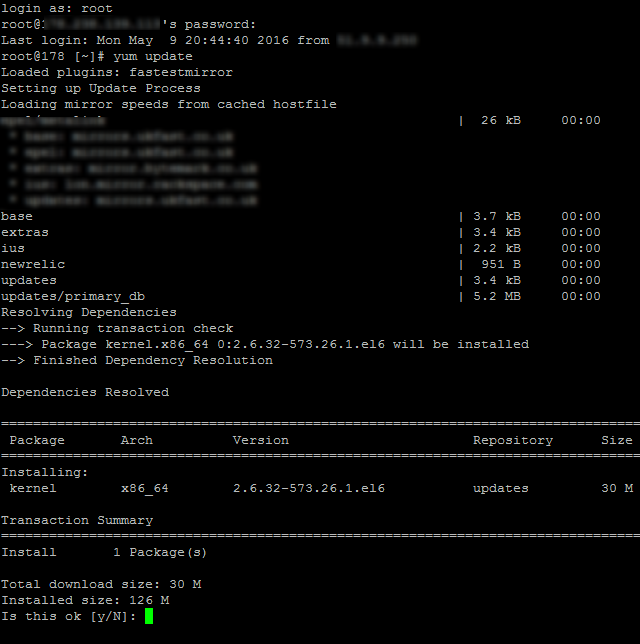
As a business owner it is your responsibility to be asking these questions and making sure that you have this part of your cybersecurity looked after. If you don’t know who is looking after this for you, you need to find out. Get in touch if you find out that this is not being looked after, as I suspect is the case for most people reading this blog post. As with all software, it is essential that your web server software is kept up to date to avoid potential cyber attacks.
This is what one small part of updating server software actually looks like to the teckies managing this for you, no pretty user interface, it’s primarily command line management;
by Michael Cropper | May 9, 2016 | Security, WordPress |
Another day, another hacked website. This time, thankfully due to the security and backup solutions in place, restoring this backup was relatively straight forward and much cheaper than if these security solutions and automated backups weren’t in place.
Usually we get businesses running to us when things have gone wrong and they have failed to plan accordingly for when this happens. Thankfully, whichever way you look at this, this business had been hacked before and since then had additional levels of security and automatic backup solutions in place to reduce the risk and help to resolve issues when they do go wrong. This being said, on this occasion, no amount of technology can protect against basic human error and weak passwords.
Below is a brief outline about what happened. It’s only a rough guide but does go to show how something as simple as a weak password can even bypass the additional security. And most importantly, this highlights the reason why you should always be planning for the worst and expecting the best. Naturally, all of the sensitive information is blocked out of the screenshots, as is information about the hackers as they deserve no additional praise for the work they have done.
Website takeover

Server Logs
The website isn’t hosted with ourselves, so by the time we investigated this we couldn’t access the server logs as web server had already been rebooted, so the error logs lost.
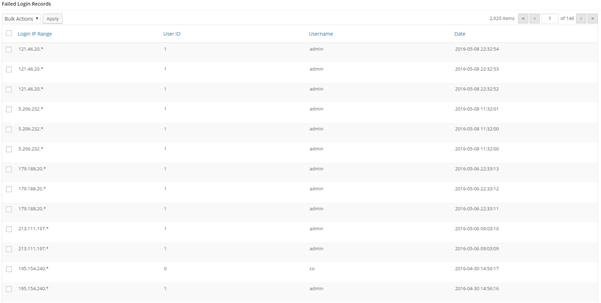
WordPress Access Logs
Show that the user ‘Admin’ logged in on 08-05-2016 at 8:55 am;

From the IP address 41.111.14.83 which is based in Algeria, Africa;
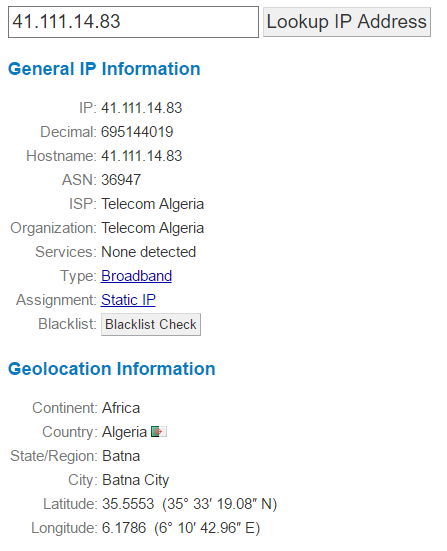
This username belonged to a member of staff at the web hosting company whose account was compromised and used to initiate the attack;

Which when looking at the access logs on the date, there weren’t many failed login attempts which suggests that their password was rather weak;
Plugin Uploaded
Now the hackers had Administrator access to the site, they uploaded a plugin which allowed them to upload a script to the site and run this script via the command line;


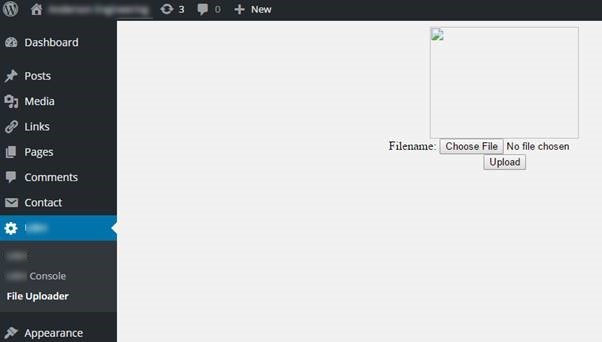
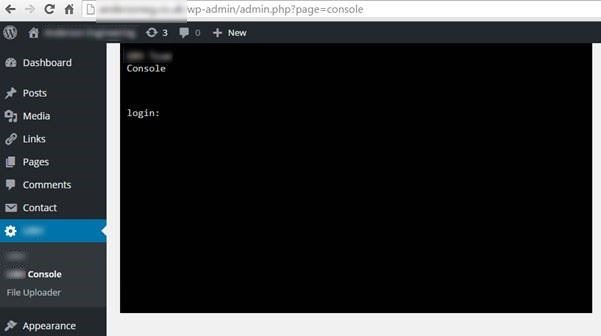
This plugin & script allowed the hackers to take over control of the whole site and display the messages.
Summary
While this does seem like an extremely simple thing, essentially guessing someone’s password. This does highlight the importance of being able to trace exactly what happened when a hack occurs. Being able to track the path the hackers took to exploit the website ultimately led to the root cause of the problem being able to be fixed to prevent this from happening again.
If you don’t have website security and automated backups in place, then get in touch. Seriously, get in place what you need to before you get hacked. Do not think that this will not happen to you. As we have just shown, even with added levels of security in place, a hack can be as simple as a weak password. Make sure you have the right technology in place to be able to identify the root causes of problems when they do occur to save yourself significant time and money dealing with things when the inevitable does happen. No-one wants to get hacked and everyone believes they will never be a target. The reality is that most businesses will get hacked at least once in their lifetime. It is only the large businesses that we often hear about in the news. In this instance, this is a story of a small business, less than 10 staff, for whom this kind of issue is something that they would prefer not to have to deal with.
In this example, we were able to respond to the issue, identify the affected areas of the website, identify the root cause & patch all within a morning. All for the cost of the price of a coffee per day. You have to ask yourself, if you don’t have the right technologies in place to deal with situations like this, how long would your website have been offline for? A day or two? A week? More? I can’t stress enough that preparation is key when dealing with cybercrime. Your digital back door is probably wide open, waiting for someone to walk by and exploit it, you just probably aren’t aware as it’s not something you can physically touch and feel.
by Michael Cropper | Apr 24, 2016 | Data and Analytics, Digital Marketing |
Sorry, I’m calling it. Businesses purchasing subscriptions to companies that are offering free data at a hugely premium price need to stop paying for this now. Stop wasting your money. Hell, give it all to a charity of your choice, it will be better money spent.
The company I’m talking about, for anyone working in digital will be well aware who this is, but for legal purposes let’s just call them a fictitious name which bears no resemblance to any company or person which happens to have a similar name, EnquiryForensics.
The offer for these types of companies is that you can “See who is looking at your website”. In summary, no you can’t. The only information that these types of companies generally provide is information that someone in Company X was looking at your website, then joining this data together with generic contact details for this company or publically accessible contact information for various staff within this organisation. This does not tell you who specifically is looking at your website. There are a whole host of data protection issues with tracking individual user website usage which is why services like Google Analytics are obliged to anonymise certain aspects of the data.
So beware, any company trying to sell you access to a tool or service which can show you who is looking at your website in a company, it is likely a snake oil salesman or company. You can generally get whatever data that have completely for free, and here’s how.
Google Analytics is Awesome
I’m not going to go into depth about Google Analytics. In summary though, Google Analytics tracks over 560 points of data for every website visitor and when you know where to look, you too can start to see how valuable this data is.
Identify the Companies Looking at your Website
Simple. Within Google Analytics, go to the following report: Audience > Technology > Network. This report will show you the companies who have been looking at your website, which can be extremely valuable for any type of B2B business as you can then feed this into your outreach pipeline and support the work your business development manager is doing on a daily basis. Look;
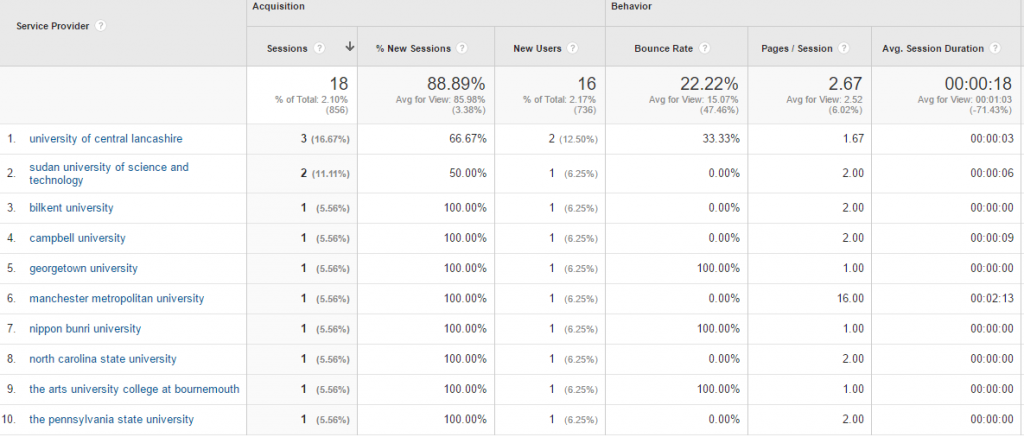
It’s all there. The companies who have been looking at your website which you can filter through to your hearts contempt. For any companies listed within here which are SMEs, a quick Google search for the company name and check on LinkedIn will soon allow you to identify the relevant person to speak with in the company who could be interested in your products and services.
Even better, you can then begin to filter down by looking at these individual companies and see what pages they viewed on your website too, so that you get a better understanding of what they are looking for.
The key here is not to be too creepy though when you reach out to these people.
All in all, you rarely ever need to pay for premium services and tools which allow you to identify who is looking at your website. With a bit of know-how, you can have access to all of this type of information for free.
If you want to find out how Google Analytics can help your business, get in touch.