So this isn’t quite as straight forward as it probably should be and the documentation from AWS is the usual, not great. So let’s cut through the nonsense and take a look at what you need to do so that you can quickly and easily get your DNS Zone Files and DNS Records migrated.
Assess Your Current DNS Provider, Zone Files, Domains and Nameserver Configurations
The first things you want to do before you start any kind of migration of your DNS over to AWS Route53 is the plan. Plan, plan and plan some more. Some of the nuances I came across with a recent DNS migration piece of work from DNS Provider X to AWS Route53 included some niggles such as vanity nameservers. The old DNS provider had things configured to ns1.example.com and ns2.example.com, then domain1.com and domain2.com pointed their nameservers to ns1.example.com and ns2.example.com which was quite a nice touch. This doesn’t quite work on AWS Route53 and I’ll explain that in a bit more detail in a moment. Another niggle that we came across that you need to plan properly and that is to make sure you have absolutely everything documented, and documented correctly. This needs to include for every domain at an absolute minimum things such as;
- Domain name
- Sub-Domains
- Registrar (inc. login details, and any Two Factor Authentication 2FA steps required)
- Accurate Zone File
The vast majority of people just have a Live version of their DNS Zone Files, which in itself is risky because if you had an issue with the DNS Provider X and you had no backup of the files, you could be in for a whole world of pain trying to re-build things manually in the event of a critical failure.
How AWS Route53 Manages Hosted Zones
So back to the point I mentioned earlier around vanity nameservers and why this doesn’t quite work in the way the old DNS Provider X worked. When you create a new Hosted Zone within AWS Route53, Amazon automatically assigns 4x random nameservers of which you can see an example below;
- ns-63.awsdns-07.com
- ns-1037.awsdns-01.org
- ns-1779.awsdns-30.co.uk
- ns-726.awsdns-26.net
What you will instantly notice here is that there are a lot of numbers in those URLs which should give you an idea of the complexity of the nameserver infrastructure behind the scenes on the Route53 service. What this also means is that because these nameservers are automatically generated you can’t configure two Hosted Zones to use the exact same nameservers to get the similar vanity nameserver setup explained earlier.
The reality is, this approach while is fairly common for complex setups, the majority of standard setups this isn’t an issue for. If you want to get vanity nameservers set up on AWS for a single domain, i.e. ns1.domain1.com and ns1.domain2.com etc. then you can do this if you wish.
Export Zone Files from your Old DNS Provider
The first step of this process is to export your Zone Files from your old DNS provider. What you will find from this process is that ever provider will export these slightly differently, and this highly likely won’t be in the format that Route53 needs when you import the Zone Files.
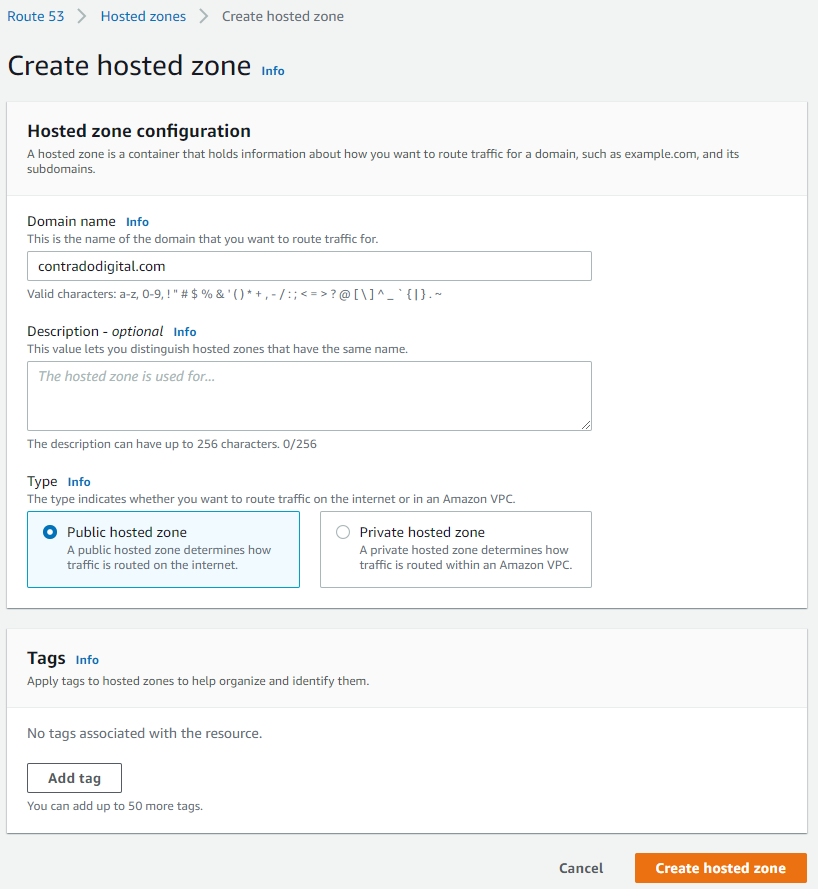
Create a Hosted Zone in Route53
This step is straight forward, just click the button.
Importing Zone Files to your Hosted Zone
As such, it’s time to prepare your Zone Files to be able to be imported into Route53 successfully. The format you need for your zone file import is as follows;
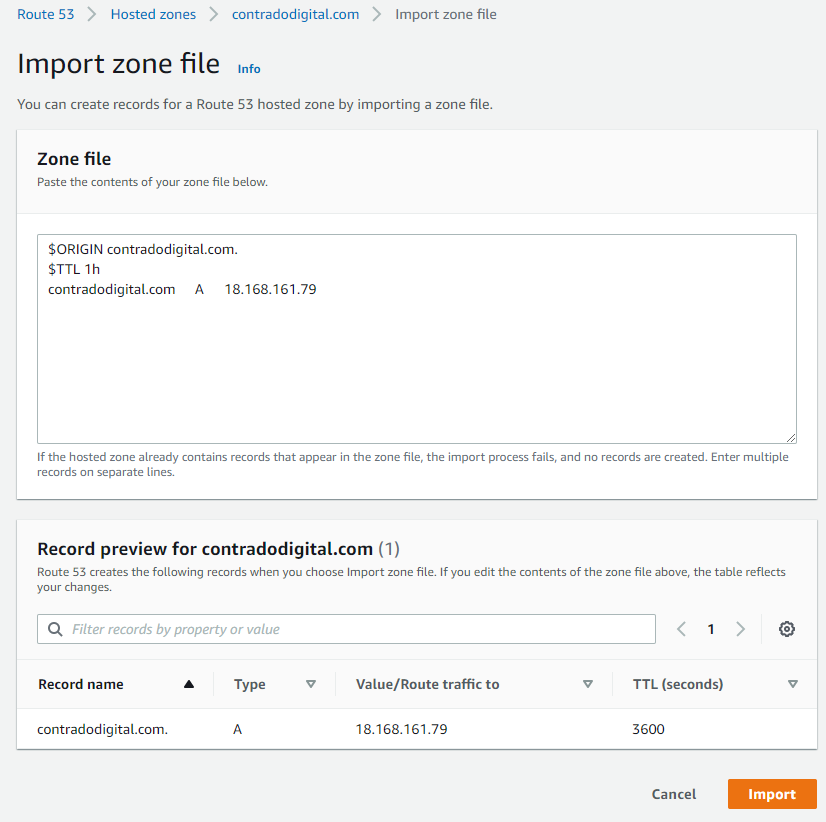
$ORIGIN contradodigital.com.
$TTL 1h
contradodigital.com A 18.168.161.79
Notice the couple of additional lines you need to add in which likely won’t be included from your export from your old provider. The above is just a very basic set of DNS entries. The reality is you will likely have 10 – 50+ DNS entries per domain depending on the complexity of your setup. One to keep an eye out on is that you may find certain record types don’t quite import seamlessly. Just a few niggles that I came across doing this included;
- MX records required a 10 included, i.e. contradodigital.com MX 10 contradodigital-com.mail.protection.outlook.com
- DKIM (TXT) and SPF (TXT) records had to be re-generated and imported manually as the format just didn’t quite work for the automatic import for some reason.
And I’m sure you’ll come across a few issues along the way that I haven’t mentioned here.
Summary
Hopefully this guide on how to import Zone Files into AWS Route53 helps to clarify some of the niggles around using the Zone File Import feature. To reiterate around this process when you are doing this in a real situation, make sure you plan this properly, have clear checklists and processes that you can methodically work through to ensure things are working as you do them. These types of changes can have a significant disruption to live systems if you don’t implement these things correctly.
Michael Cropper
Latest posts by Michael Cropper (see all)
- WGET for Windows - April 10, 2025
- How to Setup Your Local Development Environment for Java Using Apache NetBeans and Apache Tomcat - December 1, 2023
- MySQL Recursive Queries – MySQL While Loops – Fill Zero Sum Dates Between Dates - October 6, 2023