How to Setup Selenium Using Java and Apache NetBeans for Automated Web Browser Testing
In this guide we’re going to look at how to setup Selenium using Java and Apache NetBeans as an end to end guide so you can be up and running in no time. If you’ve not set this up before, there are a few nuances throughout the end to end process and other areas where the official documentation isn’t the best at times. So hopefully this guide can clear up some of the questions you likely have so you can start working on using Selenium to run automated browser based testing for your web applications.
Create a New Maven Java Application Project
Firstly we’re going to use Maven to simplify the installation process. If you aren’t familiar with Maven, it is essentially a package manager that allows you to easily import your project dependencies without having to manually download JAR files and add them to your libraries. You can manually install the JAR files if you like, it’s just a bit more time consuming to find all of the dependencies that you are going to need.
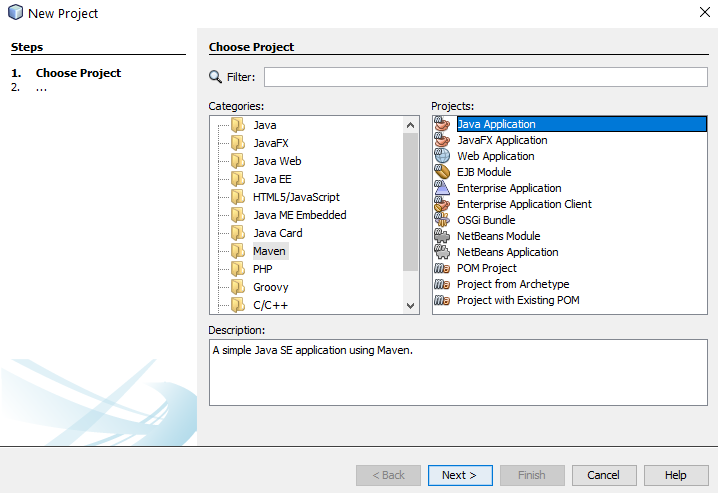
To create a new Maven project, click File > New Project and select Maven then Java Application;
Configure Maven Project and Location
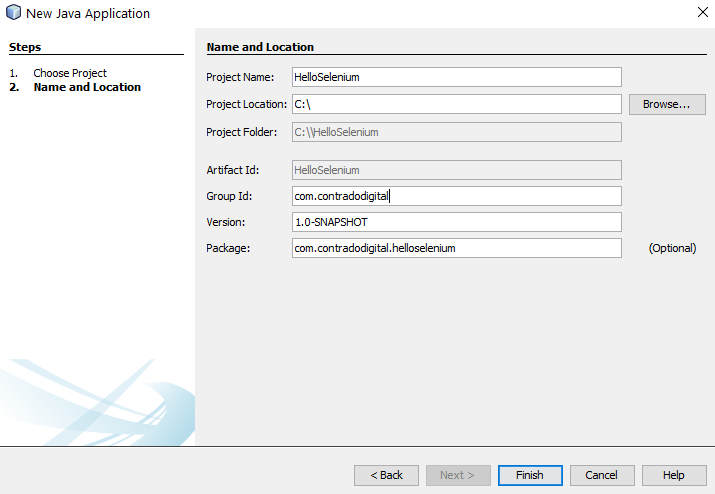
Next you need to configure some details for your project. For the purpose of simplicity we’re going to call this project HelloSelenium. And you’ll notice that when you enter the Group ID field, set this to the canonical name of your package which you generally want to set to your primary domain name in reverse, i.e. com.contradodigital, which will then automatically populate the Package name at the bottom to be com.contradodigital.helloselenium. This is industry best practice for naming your packages so that they have a unique reference.
Open Your Pom.xml File
Next we need to configure your pom.xml file which is used for Maven projects to manage your dependencies. Out of the box within NetBeans, when you create a Maven project, a very basic pom.xml file is created for you. Which sounds like it would be handy, but it doesn’t contain a great deal of information so can be more confusing than helpful for those less familiar with Maven.
When you open up the default pom.xml file, it will look similar to the following;
<?xml version="1.0" encoding="UTF-8"?>
<project xmlns="http://maven.apache.org/POM/4.0.0" xmlns:xsi="http://www.w3.org/2001/XMLSchema-instance" xsi:schemaLocation="http://maven.apache.org/POM/4.0.0 http://maven.apache.org/xsd/maven-4.0.0.xsd">
    <modelVersion>4.0.0</modelVersion>
    <groupId>com.contradodigital</groupId>
    <artifactId>HelloSelenium</artifactId>
    <version>1.0-SNAPSHOT</version>
    <packaging>jar</packaging>
    <properties>
        <project.build.sourceEncoding>UTF-8</project.build.sourceEncoding>
        <maven.compiler.source>1.8</maven.compiler.source>
        <maven.compiler.target>1.8</maven.compiler.target>
    </properties>
    <name>HelloSelenium</name>
</project>
Which looks like a good starting point, but is a long way for you to be able to simply add in the relevant dependencies and get this working. So let’s look next at what your pom.xml file needs to look like to get you up and running with Maven.
Configure Your Pom.xml File
Before we jump into what your pom.xml file needs to look like, let’s first take a look to see what the required primary libraries are that we need to get Selenium up and running. There are a fairly small number, but behind the scenes there are quite a few dependencies too which aren’t always obvious.
Just don’t ask me why you need all these and what the differences are. The Selenium documentation isn’t that great and it just seems that these are needed to get things working. If you fancy having a play with the combinations of the above to see what the absolute minimum set of libraries are, then please do comment below with your findings.
So now we know this, there are a few bits that we need to configure in your pom.xml file which include;
- Plugin Repositories – By default there are none configured. So we need to get the Maven Central Repository added in
- Repositories – As above
- Dependencies – We need to add the 6x project dependencies so that they can be imported directly into your NetBeans environment
So to do all the above, your pom.xml file needs to look like the following;
    <?xml version="1.0" encoding="UTF-8"?>
<project xmlns="https://maven.apache.org/POM/4.0.0" xmlns:xsi="http://www.w3.org/2001/XMLSchema-instance" xsi:schemaLocation="https://maven.apache.org/POM/4.0.0 http://maven.apache.org/xsd/maven-4.0.0.xsd">
    <modelVersion>4.0.0</modelVersion>
    <groupId>com.contradodigital</groupId>
    <artifactId>HelloSelenium</artifactId>
    <version>1.0-SNAPSHOT</version>
    <packaging>jar</packaging>
    <properties>
        <project.build.sourceEncoding>UTF-8</project.build.sourceEncoding>
        <maven.compiler.source>1.8</maven.compiler.source>
        <maven.compiler.target>1.8</maven.compiler.target>
    </properties>
    <pluginRepositories>
        <pluginRepository>
            <id>central</id>
            <name>Central Repository</name>
            <url>https://repo.maven.apache.org/maven2</url>
            <layout>default</layout>
            <snapshots>
                <enabled>false</enabled>
            </snapshots>
            <releases>
                <updatePolicy>never</updatePolicy>
            </releases>
        </pluginRepository>
    </pluginRepositories>
    <repositories>
        <repository>
            <id>central</id>
            <name>Central Repository</name>
            <url>https://repo.maven.apache.org/maven2</url>
            <layout>default</layout>
            <snapshots>
                <enabled>false</enabled>
            </snapshots>
        </repository>
    </repositories>
    <dependencies>
        <!-- https://mvnrepository.com/artifact/org.seleniumhq.selenium/selenium-java -->
        <dependency>
            <groupId>org.seleniumhq.selenium</groupId>
            <artifactId>selenium-java</artifactId>
            <version>3.141.59</version>
        </dependency>
        <!-- https://mvnrepository.com/artifact/org.seleniumhq.selenium/selenium-api -->
        <dependency>
            <groupId>org.seleniumhq.selenium</groupId>
            <artifactId>selenium-api</artifactId>
            <version>3.141.59</version>
        </dependency>
        <!-- https://mvnrepository.com/artifact/org.seleniumhq.selenium/selenium-server -->
        <dependency>
            <groupId>org.seleniumhq.selenium</groupId>
            <artifactId>selenium-server</artifactId>
            <version>3.141.59</version>
        </dependency>
        <!-- https://mvnrepository.com/artifact/org.seleniumhq.selenium/selenium-chrome-driver -->
        <dependency>
            <groupId>org.seleniumhq.selenium</groupId>
            <artifactId>selenium-chrome-driver</artifactId>
            <version>3.141.59</version>
        </dependency>
        <!-- https://mvnrepository.com/artifact/org.seleniumhq.selenium/selenium-remote-driver -->
        <dependency>
            <groupId>org.seleniumhq.selenium</groupId>
            <artifactId>selenium-remote-driver</artifactId>
            <version>3.141.59</version>
        </dependency>
        <!-- https://mvnrepository.com/artifact/junit/junit -->
        <dependency>
            <groupId>junit</groupId>
            <artifactId>junit</artifactId>
            <version>4.13.2</version>
            <scope>test</scope>
        </dependency>
    </dependencies>
</project>
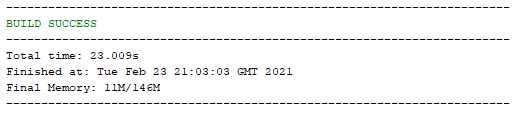
Once you’ve done this, save. Then Right Click on your project name and select ‘Build with Dependencies’ which will pull all of the dependencies into your NetBeans project. You should see a successful build message here;
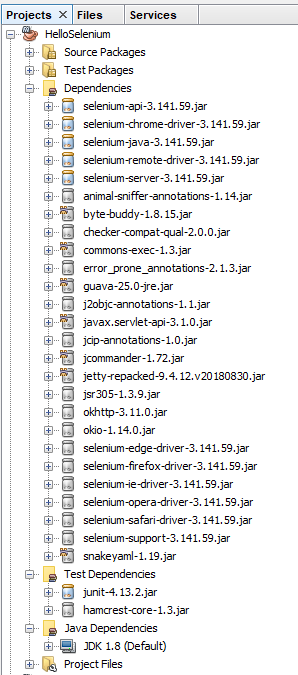
And you should also notice that within your NetBeans Project the total number of Dependencies and Test Dependencies that have now been imported have grown to significantly more than 6 JAR files that have been imported. This is one of the huge benefits of using a package dependency management system such as Maven as it just helps you get things working with ease. Can you imagine having to find all of the different libraries that have now been imported manually and keeping everything in sync? Here is what has now been imported for you automatically;
Note, if this is the first time you are getting Maven set up on your machine, you may find a few issues along the way. One of the common issues relates to an error that NetBeans throws which states;
“Cannot run program “cmd”, Malformed argument has embedded quote”
Thankfully to fix this you simply need to edit the file, C:\Program Files\NetBeans 8.2\etc\netbeans.conf and append some text to the line that contains netbeans_default_options;
-J-Djdk.lang.Process.allowAmbiguousCommands=true
So that the full line now reads;
netbeans_default_options=”-J-client -J-Xss2m -J-Xms32m -J-Dapple.laf.useScreenMenuBar=true -J-Dapple.awt.graphics.UseQuartz=true -J-Dsun.java2d.noddraw=true -J-Dsun.java2d.dpiaware=true -J-Dsun.zip.disableMemoryMapping=true -J-Djdk.lang.Process.allowAmbiguousCommands=true”
If you’re interested in why this is required, this release note outlines the issue in more detail.
You will find there will be the odd nuance like this depending on the version of NetBeans / Java / JDK / Maven etc. that you are running. Rarely do things seamlessly line up. So if you encounter any slightly different issues within your setup, then please do leave a comment below once you’ve found a solution to help others in the future.
Install Selenium IDE
Ok, so now we’ve got our NetBeans environment up and running. It’s time to make life as easy as possible. I’m assuming you don’t want to be writing everything manually for your web browser test scripts? I mean, if you do, enjoy yourself, but personally I prefer to make life as easy as possible by using the available tools at hand. This is where the Selenium IDE comes into play.
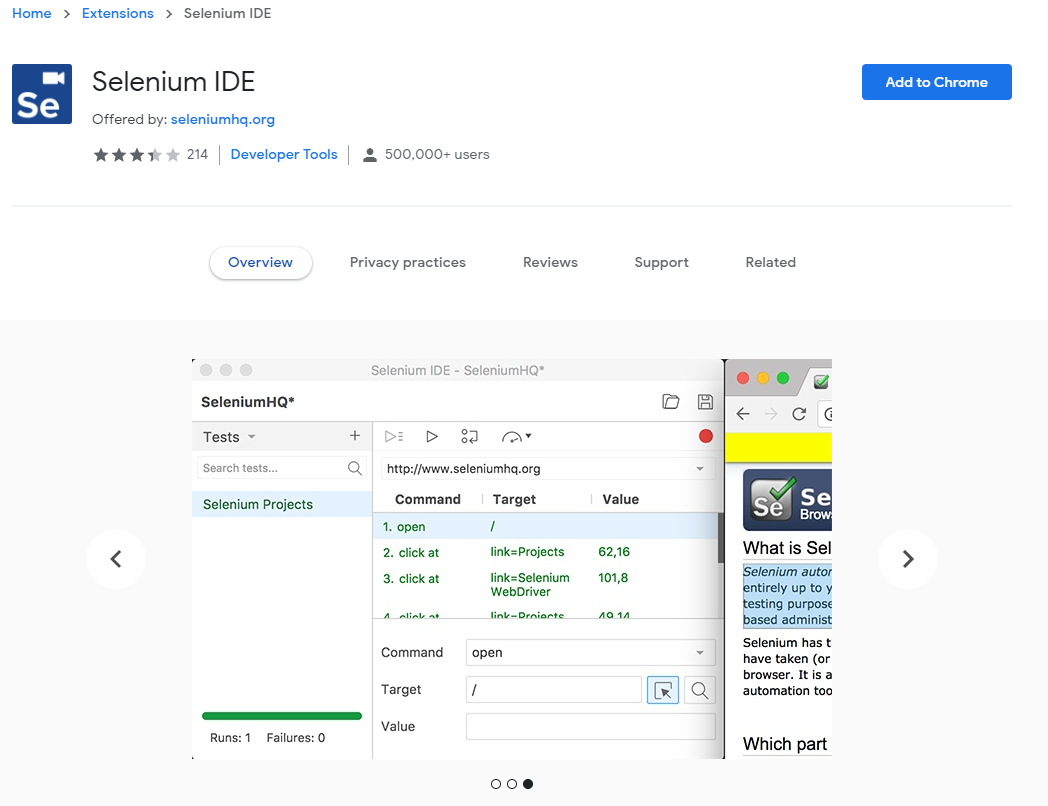
The Selenium IDE is a Google Chrome Extension that you can easily download and install at the click of a button;
Once you’ve done this you will notice that the Extension has added a button at the top right of your Chrome browser that you can click on to open the Selenium IDE. If you’re from a tech heavy software development background, you’re probably expecting an installed desktop application whenever you hear the word IDE mentioned, but in this case it is nothing more than a Chrome Extension.
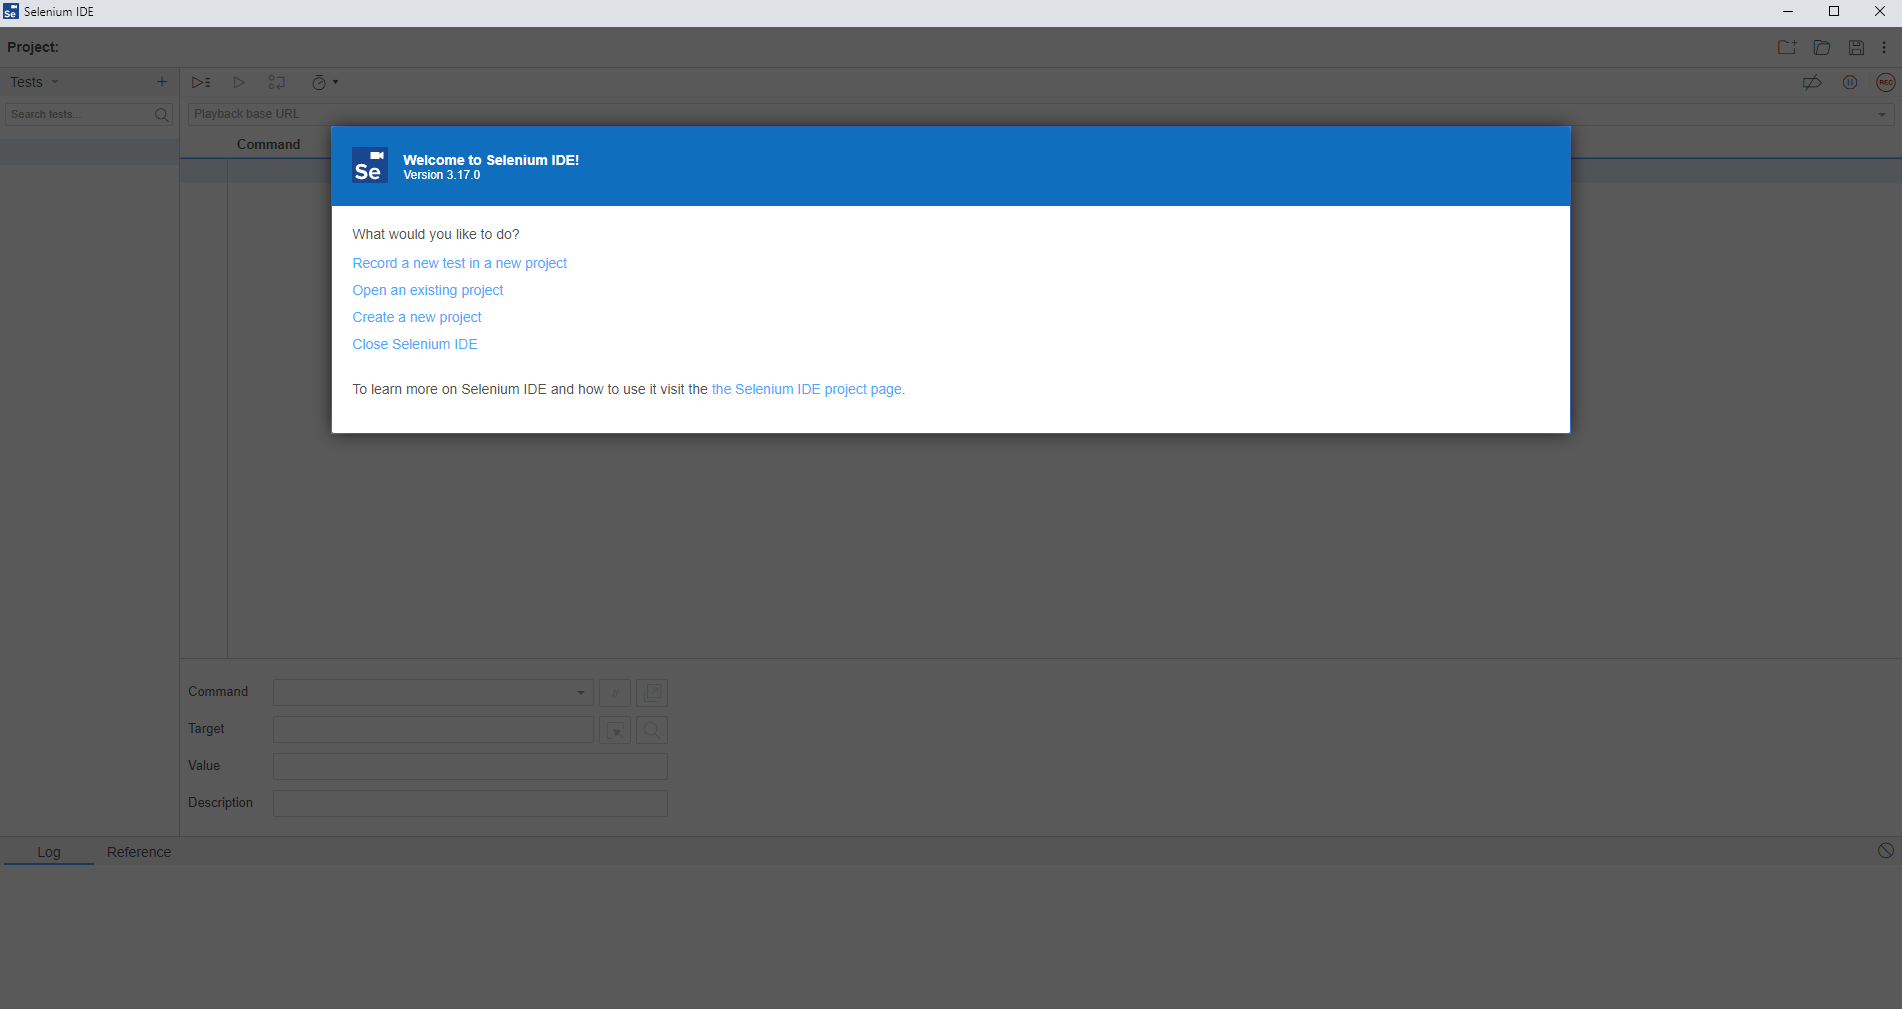
Click the Selenium IDE icon in Chrome to open it up. Once it is open for the first time you will notice a basic welcome screen;
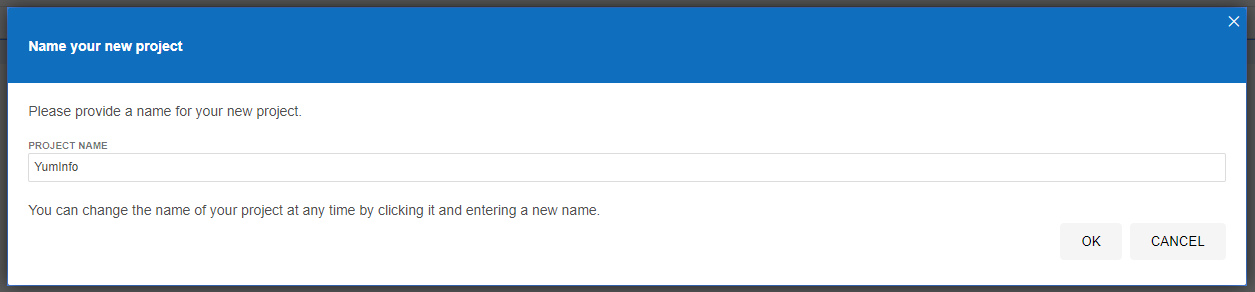
Click on Create a New Project to get started. Give your project a name so it’s clear what you are testing. In this example we’re going to be doing some testing on YumInfo which is an application we created to help software developers and infrastructure engineers easily search through the 20,000 packages that are contained within common Yum Repositories. Exactly like we have the Maven Central Repository for installing Java packages, it’s the same thing, just focused on Linux level software packages instead.
Create Your First Automated Web Browser Test in Selenium IDE
Ok, so now we’ve got Selenium installed and a new project created, let’s get onto creating your first automated browser test so you can get a feel for how all this works. It’s extremely simple to do so.
Firstly click on the + button to add a new test;
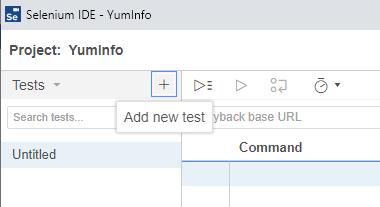
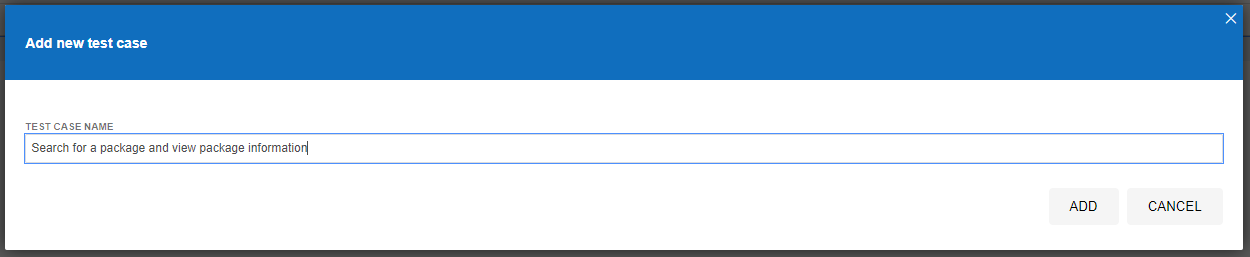
This will then open up the popup which allows you to give your new test a name. In this example, we’re going to test if we can use the search functionality on the YumInfo site to easily find a useful package.
Once you’ve done this, you’ll notice that a new Test Case has been created for you which is in the left section of the screenshot below, but you’ll notice there are no steps that have been created yet which is why the section on the right of the screenshot below is still all blank.

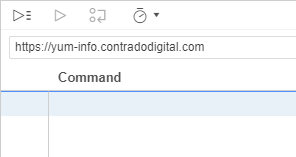
What you will notice in the above screenshot is there are two core sections that we are going to look at next;
- Playback base URL – This is the landing page that you are going to start your tests from. Generally speaking this is so you can test in the same way that your users would use the website.
- Record Button – This is in the top right coloured in red. This allows you to start the process running for recording your automated test scripts within Selenium IDE.
To get started, enter the base URL you want to work with. In our case we’re going to enter https://yum-info.contradodigital.com as that is the website we are doing the automated browser based testing on.
Then once you’ve done that. Click the red Record Button at the top right.
This step will open a brand new Chrome window and it will inform you that recording has started. It’s a very similar concept as you can record Macros in Excel if you have ever used those before.
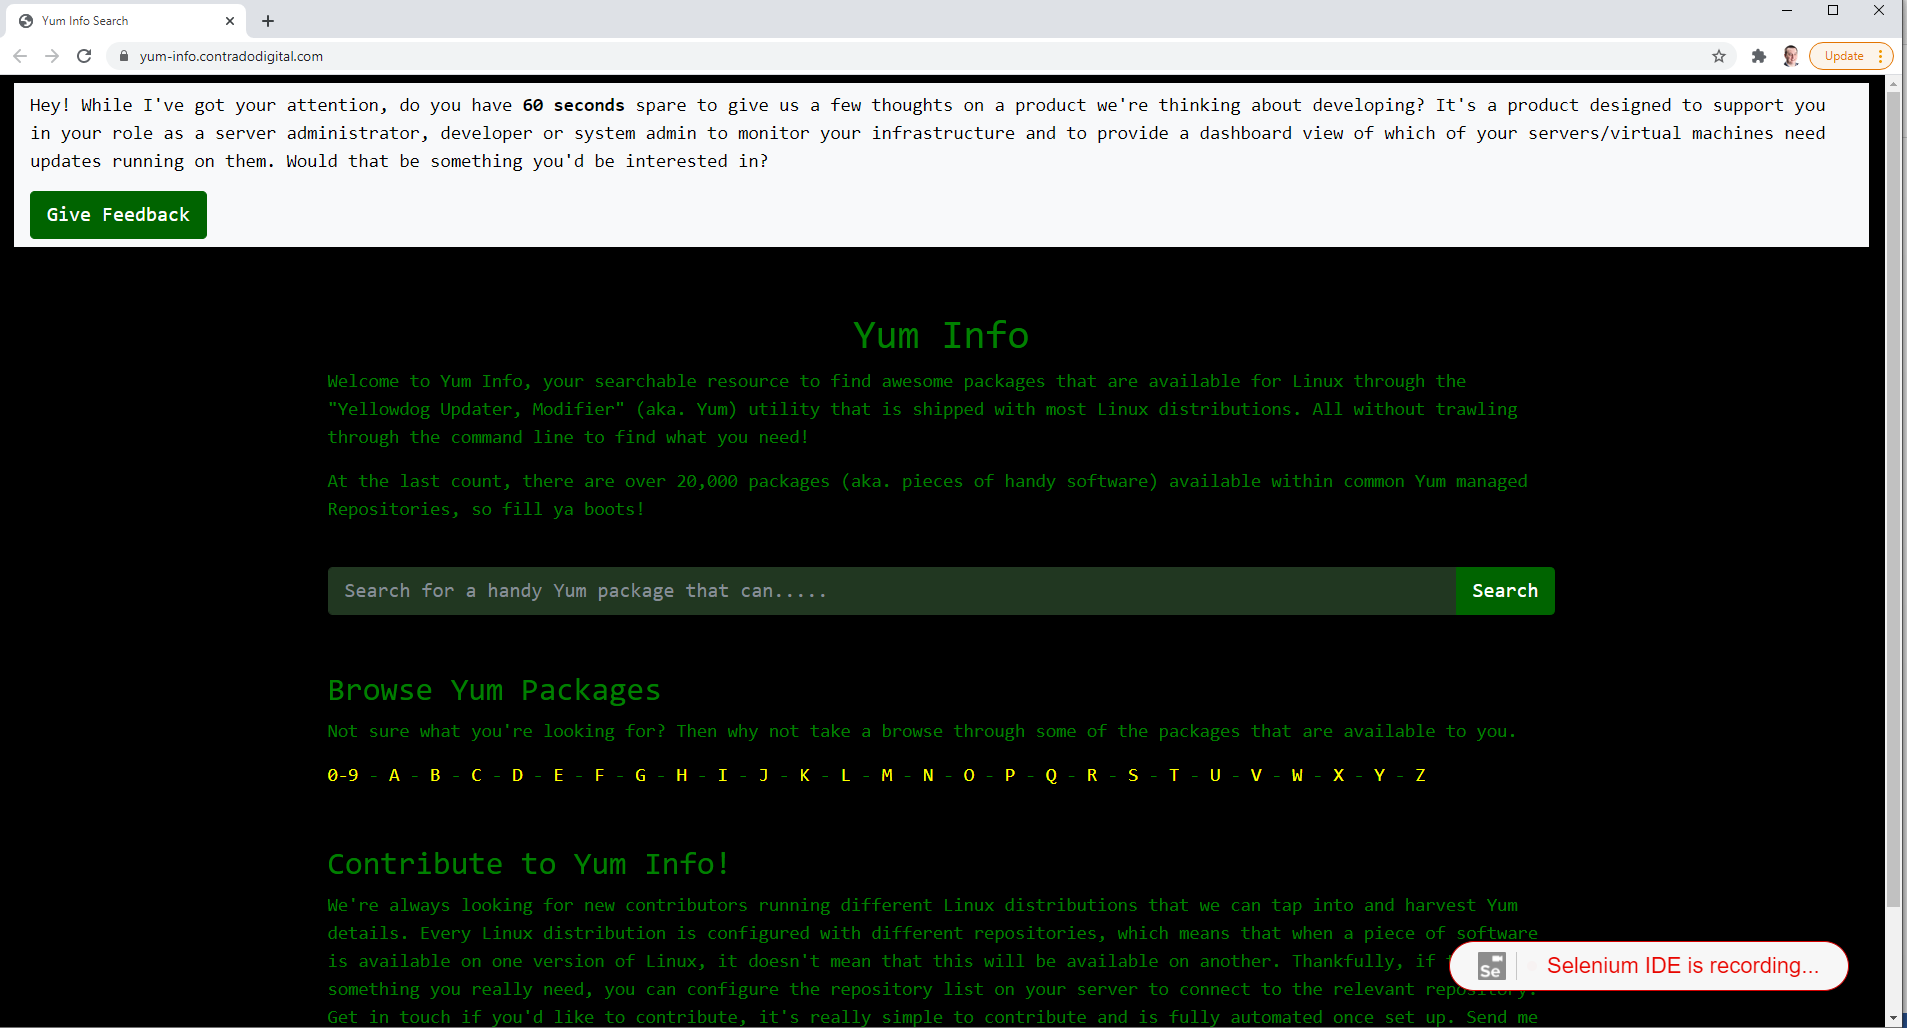
Now all you need to do is to click around your website and use it like a user would. In this case, as this specific Test Case we are looking to search for a package and then view the package information we’re going to do just that.
Once you are done clicking around, simply navigate back to your Selenium IDE that is open and click on Stop Recording. Once you have done that you will notice that the specific steps that you have just taken within the web browser have been recorded within Selenium IDE. Awesome!
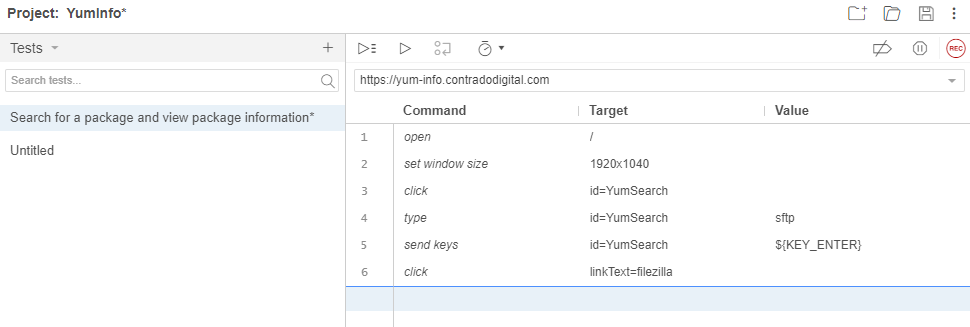
What the above steps are saying is that I followed these actions;
- Open the Base URL https://yum-info.contradodigital.com
- Set the browser window size to the default of your computer setup
- Click on the HTML Element that has an ID of ‘YumSearch’, which in this case is the search box that allows users to search for packages
- Type into the search box “sftp” without the quotes
- Then click Enter to trigger the search
- And finally, click on the link titled FileZilla which is a relevant package that can handle SFTP based communications
What all this has shown us is that as a user doing these steps, this all works as expected on the website. Hopefully this isn’t an unexpected result that basic functionality on your website is working. But this is just a simple example we are using to get you up and running.
Save this Test Case so you can reference back to it later down the line.
Re-Run Your First Automated Web Browser Test Case
Now that you have recorded your first test, you want to replay it so that you are confident that it has been recorded accurately. For traditionally built websites that use a single Request/Response you’ll find that these test generally record perfectly first time around. Whereas for websites build using more Single Page Applications / Front End Frameworks that load content dynamically into the page past the initial page load, you’ll find you will likely have a few issues with the default recordings and that the automated recording will need some manual intervention to get them to work properly.
To re-run the test you have just created, simply click on the Play button;
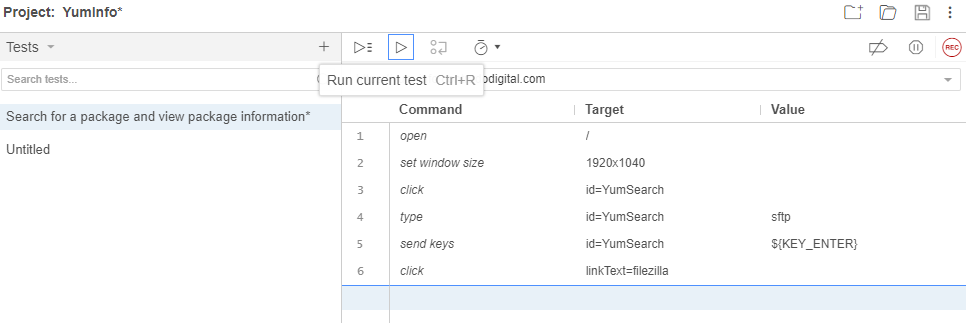
Once you click that button, you will notice that magic starts to happen. Your web browser will open and the exact steps that you just took will be replicated in real time right in front of your eyes. Most importantly, once it is complete, you will see that it has completed successfully.
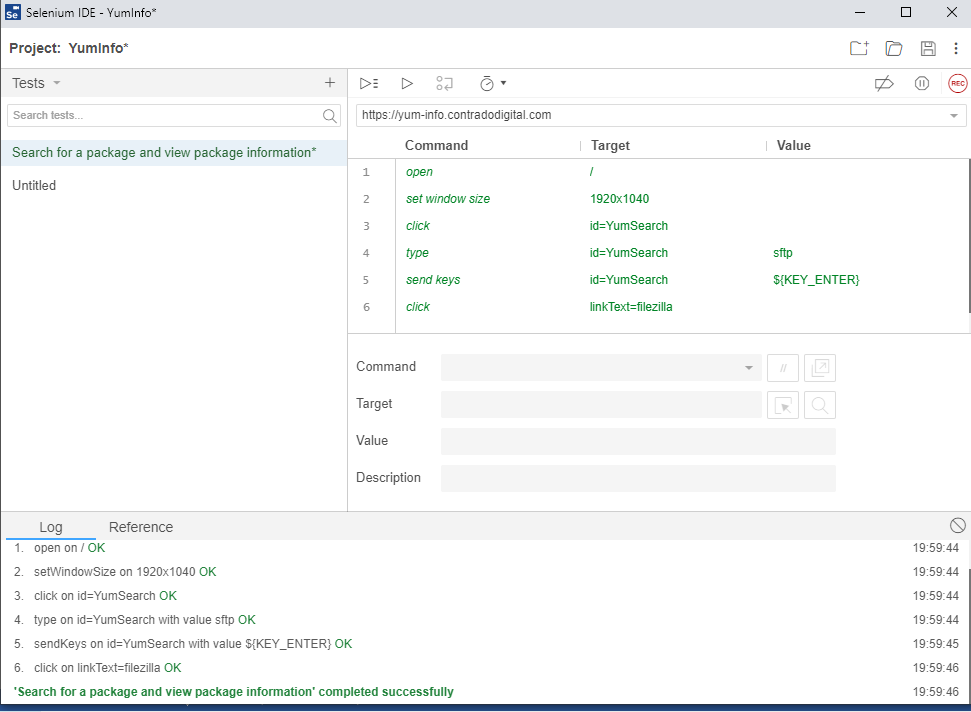
By doing this you have just proved that the Test Case has been recorded successfully and can run through to the end to confirm this end to end process works correctly. This is important as you build up your Test Cases as you will find many larger websites can have 1000s and even 10,000s of Test Cases created over time that ensure the stability of the platform.
Why Build a Library of Test Cases in Selenium IDE for Automated Web Browser Testing?
Just stepping back a little though, why are we even bothering to do this? Well quite frankly, that is a very good question – and one that you should genuinely be asking for any project that you are working on. Yes, many people say this is best practice to build automated web browser testing for web applications, and there is a very solid argument to this. Then on the other hand, if you are working with solid web application development principles, and you have awesome developers, and you have an extremely slick development process to fix forward, then you may find that Selenium automated web browser testing is just an added burden that adds very little value.
The reality is that most organisations, this isn’t the reality, so Selenium comes in extremely handy to mitigate any risk of pushing bad code through to the live environment and streamlines regression testing. Meaning that you can run a significant amount of automated tests without ever having to worry about getting users to manually test features and functionality every time you want to do a release.
Download Chrome Web Driver
Now we’ve utilised the power of the Selenium IDE to create our automated web browser for us, it’s time to take that and move it into a proper software development environment, aka. NetBeans. Before we jump into the details we’re going to need to download the Chrome Web Driver. This will allow you to make NetBeans, more specifically the Selenium and JUnit dependencies, interact with your Chrome web browser.
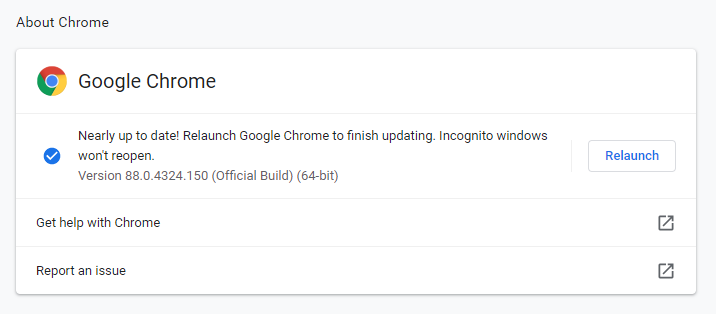
As with anything, versioning is important. So the first thing you need to do is understand what version of Google Chrome you are running. To do this, go into Google Chrome > Settings > About Chrome and you will see your version number there;
Now you know what version of Google Chrome you are using. Next you need to download the specific Google Chrome Driver that applies to your version of Google Chrome. Head over to the Chromium Chrome Driver Downloads page and find the version that applies to you.

Once you’ve downloaded the ChromeDriver and you have unzipped it, you have this on your system which we’ll reference a little later as we move your Selenium IDE generated Test Case into NetBeans.
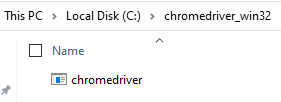
You want to put this file into a location that you aren’t going to change next week as your code will break. You need this in a handy reference location that suits how you personally organise your development environments.
Export Test Case from Selenium IDE to JUnit Format
Next we need to export the Test Case that we created in Selenium IDE so that we can then import that into NetBeans. To do this go back to Selenium IDE and right click the Test Case you created then click on Export;
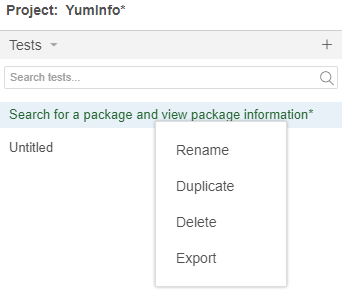
Then select the language we want to export the file to. The beauty of the Selenium IDE is that it is cross language compatible which means that you can import the Test Case into any number of your preferred automated web browser testing setups you use, in this case we’re using JUnit in Java, but you could quite easily use either NUnit or xUnit for C#, or Mocha for JavaScipt or pytest for Python or RSpec for Ruby. The choice is yours.

Once this has been exported, this will save a .java file in our example to your local file system which will look as follows;
// Generated by Selenium IDE
import org.junit.Test;
import org.junit.Before;
import org.junit.After;
import static org.junit.Assert.*;
import static org.hamcrest.CoreMatchers.is;
import static org.hamcrest.core.IsNot.not;
import org.openqa.selenium.By;
import org.openqa.selenium.WebDriver;
import org.openqa.selenium.firefox.FirefoxDriver;
import org.openqa.selenium.chrome.ChromeDriver;
import org.openqa.selenium.remote.RemoteWebDriver;
import org.openqa.selenium.remote.DesiredCapabilities;
import org.openqa.selenium.Dimension;
import org.openqa.selenium.WebElement;
import org.openqa.selenium.interactions.Actions;
import org.openqa.selenium.support.ui.ExpectedConditions;
import org.openqa.selenium.support.ui.WebDriverWait;
import org.openqa.selenium.JavascriptExecutor;
import org.openqa.selenium.Alert;
import org.openqa.selenium.Keys;
import java.util.*;
import java.net.MalformedURLException;
import java.net.URL;
public class SearchforapackageandviewpackageinformationTest {
  private WebDriver driver;
  private Map<String, Object> vars;
  JavascriptExecutor js;
  @Before
  public void setUp() {
    driver = new ChromeDriver();
    js = (JavascriptExecutor) driver;
    vars = new HashMap<String, Object>();
  }
  @After
  public void tearDown() {
    driver.quit();
  }
  @Test
  public void searchforapackageandviewpackageinformation() {
    // Test name: Search for a package and view package information
    // Step # | name | target | value
    // 1 | open | / |
    driver.get("https://yum-info.contradodigital.com/");
    // 2 | setWindowSize | 1920x1040 |
    driver.manage().window().setSize(new Dimension(1920, 1040));
    // 3 | click | id=YumSearch |
    driver.findElement(By.id("YumSearch")).click();
    // 4 | type | id=YumSearch | sftp
    driver.findElement(By.id("YumSearch")).sendKeys("sftp");
    // 5 | sendKeys | id=YumSearch | ${KEY_ENTER}
    driver.findElement(By.id("YumSearch")).sendKeys(Keys.ENTER);
    // 6 | click | linkText=filezilla |
    driver.findElement(By.linkText("filezilla")).click();
  }
}
The core bits of information that are relevant for this are the following;
  @Test
  public void searchforapackageandviewpackageinformation() {
    // Test name: Search for a package and view package information
    // Step # | name | target | value
    // 1 | open | / |
    driver.get("https://yum-info.contradodigital.com/");
    // 2 | setWindowSize | 1920x1040 |
    driver.manage().window().setSize(new Dimension(1920, 1040));
    // 3 | click | id=YumSearch |
    driver.findElement(By.id("YumSearch")).click();
    // 4 | type | id=YumSearch | sftp
    driver.findElement(By.id("YumSearch")).sendKeys("sftp");
    // 5 | sendKeys | id=YumSearch | ${KEY_ENTER}
    driver.findElement(By.id("YumSearch")).sendKeys(Keys.ENTER);
    // 6 | click | linkText=filezilla |
    driver.findElement(By.linkText("filezilla")).click();
  }
Here you can see the 6 steps that were in the original Selenium IDE which are visualised as code. This is extremely handy as this now gives you full control over every aspect of Selenium by using the power of the library to do what you need to do and more by using the power of JUnit too. Selenium by itself will only take you so far, you need to integrate Selenium with a proper testing framework such as JUnit to get the most from the technology. By exporting this code, this is the first step of the process to enhancing your automated web browser testing setup.
Create a New JUnit Test File in NetBeans
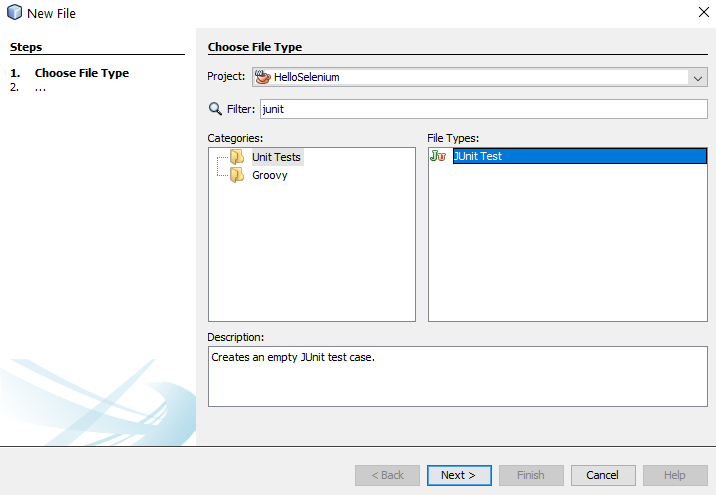
Ok, so back over to NetBeans. We want to import the Exported JUnit file from Selenium IDE into NetBeans so that we can manage the lifecycle of this Test Case better and work collaboratively with our colleagues. We’ll jump into more around the team collaboration elements of Selenium a little later. For now, let’s first jump in and get the JUnit Test added to NetBeans. To do this, right click on a folder in your project in NetBeans and select New File, then search for JUnit, then select JUnit Test and click Next.
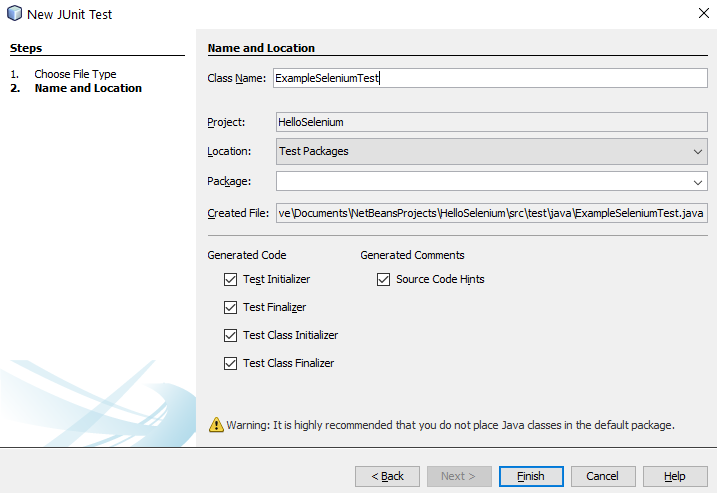
Once you’ve done that, give your new JUnit Test a Class Name and click Finish.
You will notice that this has generated a bunch of code for your automatically which is quite handy. This is great, but what you will also notice is that this doesn’t quite align 100% with the code that has been generated by the Selenium IDE. This is because here you have created a specific JUnit Test based on what NetBeans thinks a Test looks like, whereas the code that was generated in Selenium IDE was code that was a JUnit test that is specific to the test you created.
import org.junit.After;
import org.junit.AfterClass;
import org.junit.Before;
import org.junit.BeforeClass;
import org.junit.Test;
import static org.junit.Assert.*;
import org.openqa.selenium.By;
import org.openqa.selenium.WebDriver;
import org.openqa.selenium.WebElement;
import org.openqa.selenium.chrome.ChromeDriver;

/**
 *
 * @author Michael Cropper
 */
public class ExampleSeleniumTest {

    public ExampleSeleniumTest() {
    }

    @BeforeClass
    public static void setUpClass() {
    }

    @AfterClass
    public static void tearDownClass() {
    }

    @Before
    public void setUp() {
    }

    @After
    public void tearDown() {
    }

    // TODO add test methods here.
    // The methods must be annotated with annotation @Test. For example:
    //
    // @Test
    // public void hello() {}
}
Merge Your Exported Selenium IDE Test Case Into Your NetBeans JUnit Test Class
The next step is generally best to be done as a copy and paste to fit the automatically generated Selenium IDE Test Case code into the standardised approach you use for your JUnit Test Classes within NetBeans. Don’t just blindly copy and paste the code as while the automatically generated code is handy, you need to manage this code to fit with your specific needs and use cases.
In this example, here’s what the JUnit Test Class looks like now I’ve manually merged this code;
import org.junit.After;
import org.junit.AfterClass;
import org.junit.Before;
import org.junit.BeforeClass;
import org.junit.Test;
import static org.junit.Assert.*;
import org.openqa.selenium.By;
import org.openqa.selenium.Dimension;
import org.openqa.selenium.Keys;
import org.openqa.selenium.WebDriver;
import org.openqa.selenium.WebElement;
import org.openqa.selenium.chrome.ChromeDriver;

/**
 *
 * @author Michael Cropper
 */
public class ExampleSeleniumTest {

    public ExampleSeleniumTest() {
    }

    @BeforeClass
    public static void setUpClass() {
    }

    @AfterClass
    public static void tearDownClass() {
    }

    private WebDriver driver;

    @Before
    public void setUp() {
        System.setProperty("webdriver.chrome.driver", "C:/chromedriver_win32/chromedriver.exe");
        driver = new ChromeDriver();
    }

    @After
    public void tearDown() {
        driver.quit();
    }

    @Test
    public void searchforapackageandviewpackageinformation() {
        // Test name: Search for a package and view package information
        // Step # | name | target | value
        // 1 | open | / |
        driver.get("https://yum-info.contradodigital.com/");
        // 2 | setWindowSize | 1920x1040 |
        driver.manage().window().setSize(new Dimension(1920, 1040));
        // 3 | click | id=YumSearch |
        driver.findElement(By.id("YumSearch")).click();
        // 4 | type | id=YumSearch | sftp
        driver.findElement(By.id("YumSearch")).sendKeys("sftp");
        // 5 | sendKeys | id=YumSearch | ${KEY_ENTER}
        driver.findElement(By.id("YumSearch")).sendKeys(Keys.ENTER);
        // 6 | click | linkText=filezilla |
        driver.findElement(By.linkText("filezilla")).click();
    }
}
A couple of really important parts to be made aware of in the above code snippet are these;
private WebDriver driver;

    @Before
    public void setUp() {
        System.setProperty("webdriver.chrome.driver", "C:/chromedriver_win32/chromedriver.exe");
        driver = new ChromeDriver();
    }

    @After
    public void tearDown() {
        driver.quit();
    }
These are the following lines of code / methods;
- private WebDriver driver;
- This line of code is required to ensure you can easily open/close the WebDriver at the start and end of this Test Class. Over time you may have many Tests contained within a single Test Class, so by using this approach it is significantly more efficient and allows you to re-use the object without having to instantiate it every single time you run a Test within this Test Class.
- This then aligns with the contain within the setup() method and the teardown()
- setProperty(“webdriver.chrome.driver”, “C:/chromedriver_win32/chromedriver.exe”);
- This is what enables your JUnit code to communicate with your Google Chrome Web Browser and control it.
- public void searchforapackageandviewpackageinformation()
- Hopefully you recognise the contents of this method which is the automatically generated code produced by Selenium IDE that we have merged into this JUnit Test Class.
Run Your JUnit Test Class
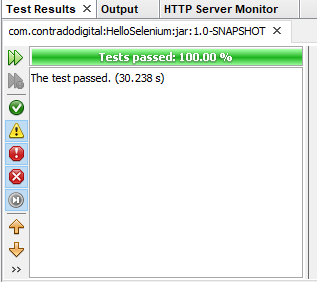
Excellent, now we’re at a point that we can actually run our JUnit Test Class to confirm everything is still working as expected. To do this simply Right Click and select Test File within your JUnit Test Class. If everything has merged successfully you should see your Google Chrome Web Browser kick into action, run the test and the test should pass.
Collaborating with Colleagues
Finally we’re going to briefly touch on how you now collaborate with colleagues using Selenium and JUnit Test Classes. Everything we have done so far is excellent if you are working by yourself and just having a play around. But in any real world environment you are going to be working with a lot of colleagues that span different roles/responsibilities and even departments. This is where the collaboration element really kicks in. For the purpose of this blog post and to keep things fairly simplistic we’re going to highlight how this approach works when you are working between Developers and Quality Assurance (QA) or Test people.
One point to note is that this isn’t going to be a tutorial on how to use Git, so if you are unfamiliar with some of the concepts below then you are going to need to do a bit of background reading. To get up to speed with how to use Git and why it is important, then read the Git Book. Once you’ve read that about 10x from a standing start with zero knowledge you’ll probably understand it. We’ll do a write up on Git in a bit more detail at some point as it is a topic that is hugely misunderstood and often implemented incorrectly which can cause a lot of problems.
Below is a diagram of a generic process that can be handy to implement in organisations to show you how the different steps fit together along the Software Development Life Cycle, specifically focused around Selenium and team collaboration.

Summary
Hopefully this guide on how to setup Selenium using Java and Apache NetBeans has been helpful to get you up and running with Selenium in no time at all. This is very much the basics of automated web browser testing using a very specific set of technology, tooling and processes. There is an awful lot more that could be covered on this topic and that is perhaps one for another day. For now, this is just the very basics about getting up and running.

