In this blog post we’re going to look at how to setup a UniFi managed switch on your network. For simplicity and to help people get started we’re going to assume that this is the first managed switch you are looking to add into your network. We’re also going to assume you’ve got commercial grade modem and router hardware, none of the consumer grade stuff that just doesn’t really work for these types of commercial type setups.
Basic Network Architecture for a UniFi Managed Switch
Ok so let’s assume you’re new to all this networking malarkey, we’re going to take you through how to setup a Ubiquiti UniFi managed switch so you can adopt this on your network. For the purpose of this blog post we’re going to use a very basic base level architecture;
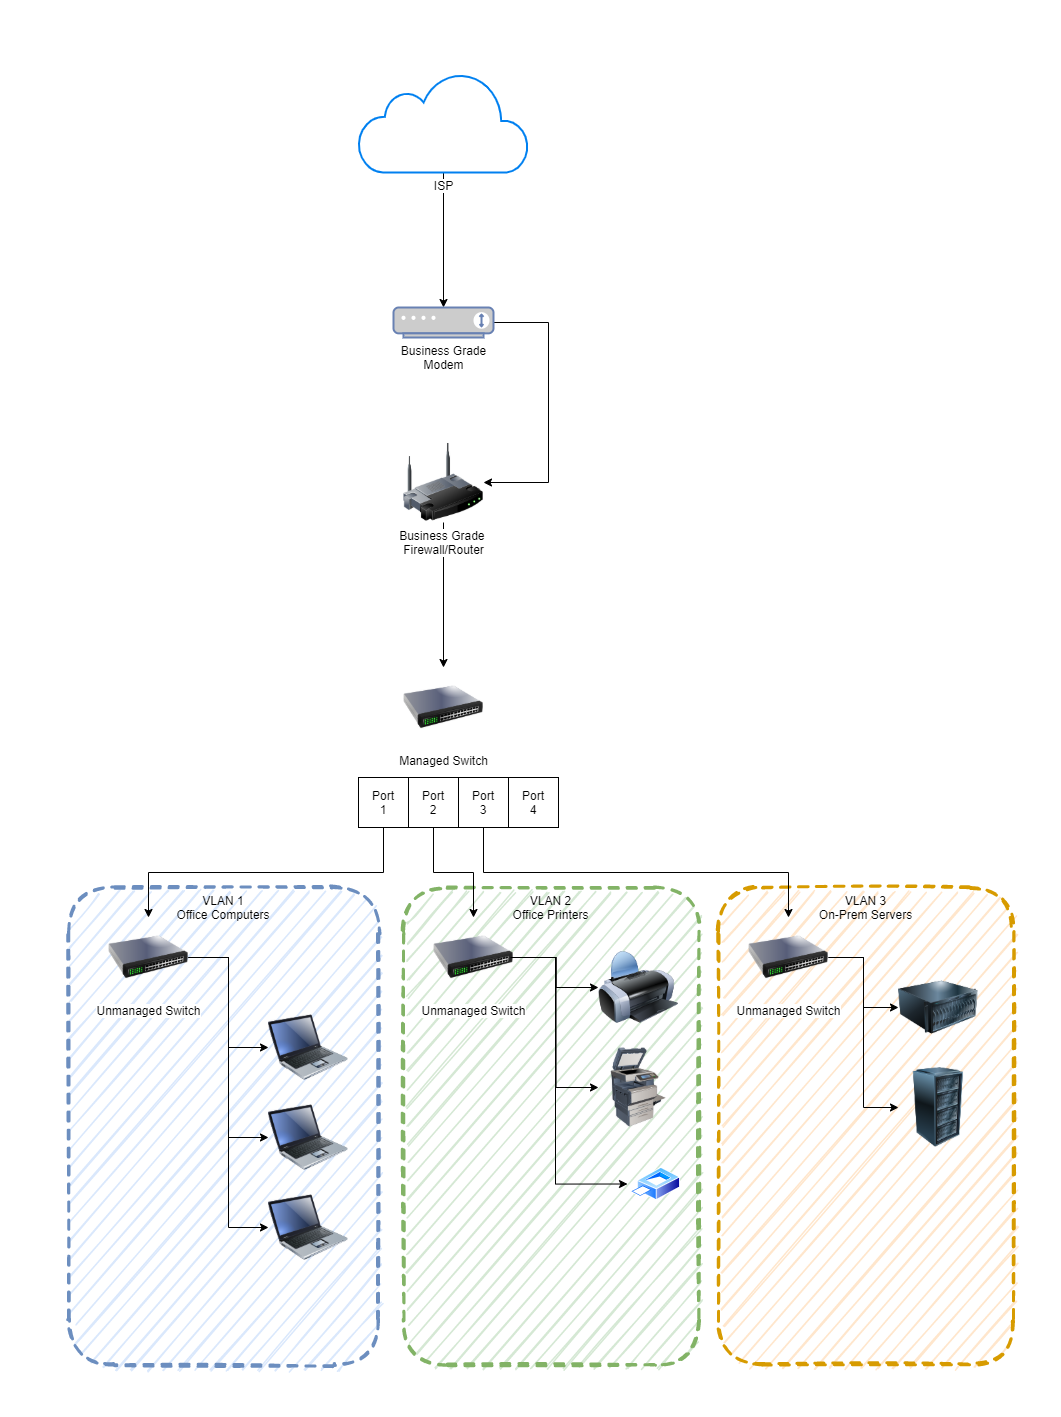
As you can see in the image above, the managed switch is bang in the centre. This is the Ubiquiti UniFi managed switch. Before we jump into how to get this set up and plugged into your network, if you aren’t sure about the differences, then we’ve done a blog post so you can easily understand What is the Difference Between a Managed Switch VS an Unmanaged Switch, have a read over that if you need a refresher.
Physical Ubiquiti UniFi Managed Switch Hardware
What we are working with here is basically this device;

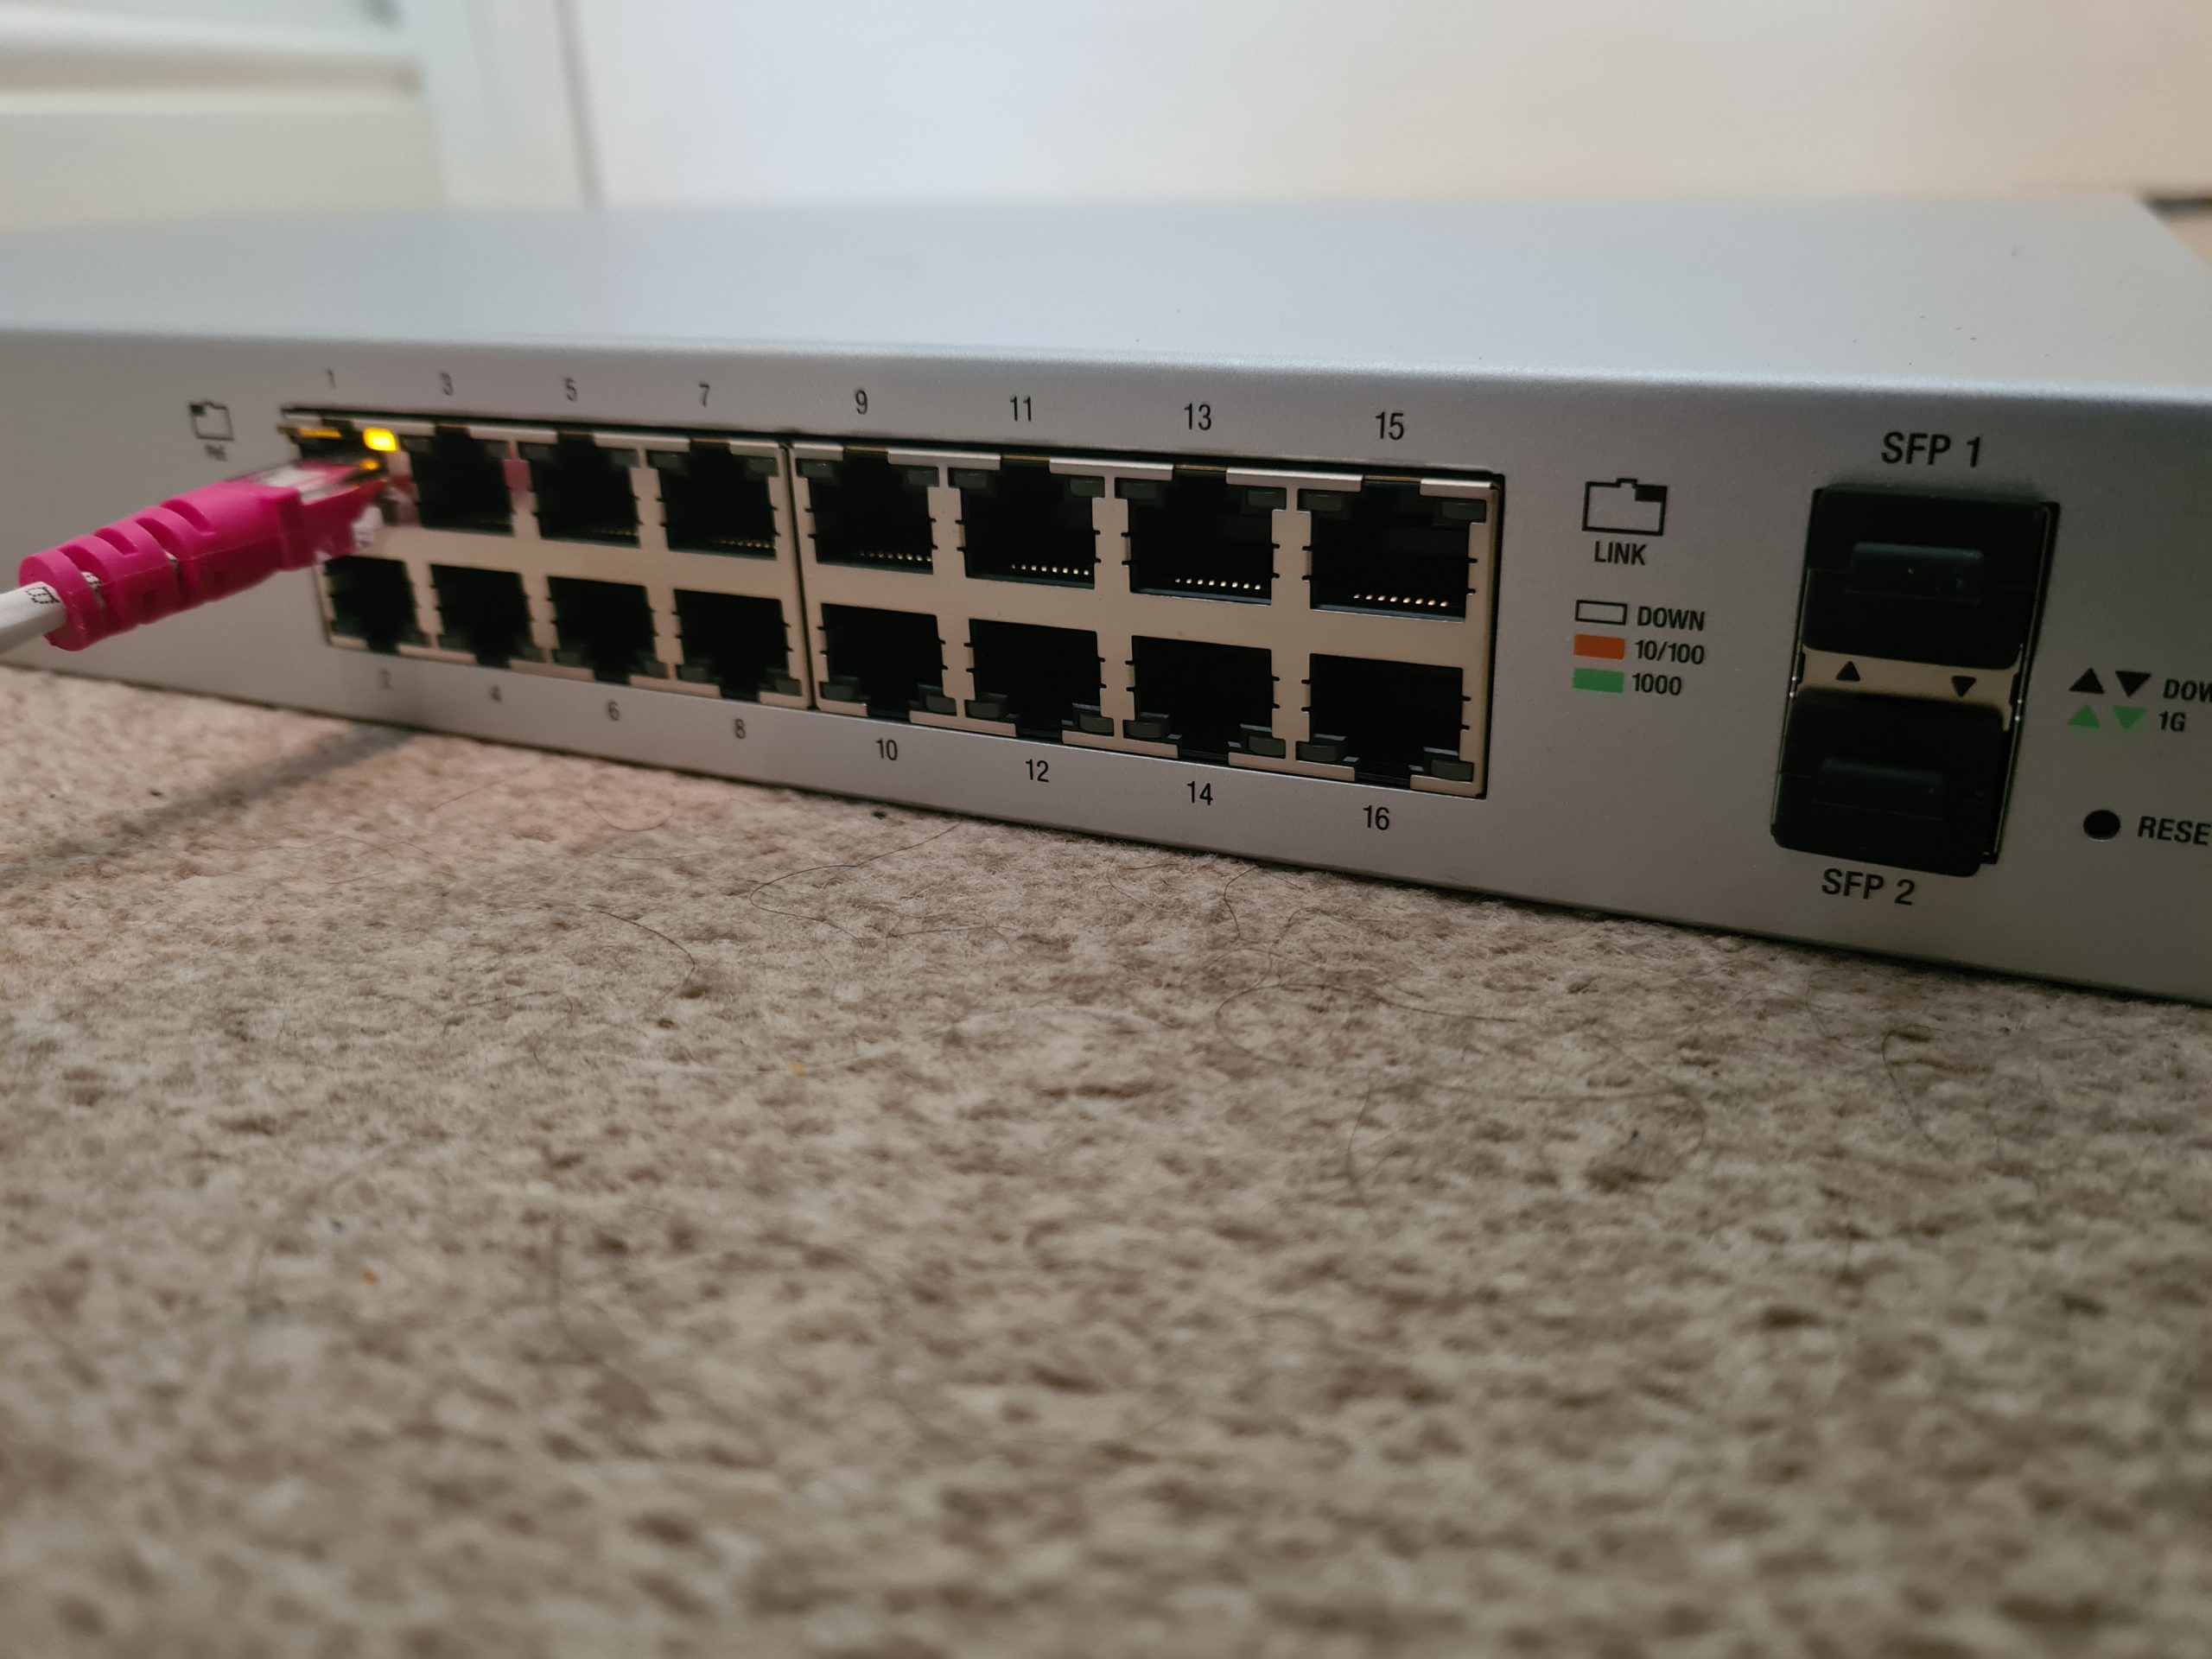
First of all, to get started simply plug the managed switch into your network. We’re assuming here that you’re currently working with a flat network so everything can see everything. You’re going to need to make sure you’re plugging the managed switch into the correct part of your network if you’re already got other managed switches and VLANs set up all over the place. But we’ll skip over that added complexity for the purpose of simplicity in this blog post.
Check UniFi Managed Switch is Showing in Firewall/Router
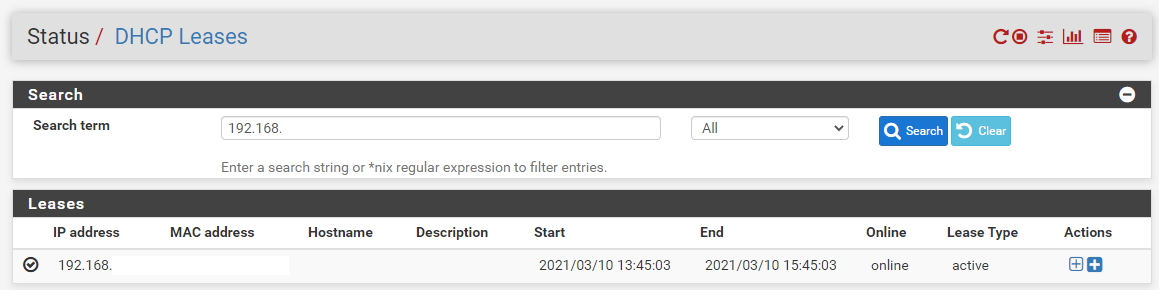
Ok, so now you’re plugged in, you need to head over to your Firewall/Router Admin screen and view the devices on the network. This is usually under a DHCP Leases type page within the admin interface. If you aren’t sure how to access your Firewall/Router admin interface, it’s highly likely to be either 192.168.0.1 or 192.168.1.1 which are fairly standard across a range of firewalls and routers. Simply type that into your web browser and you should be presented with a login screen. If you haven’t accessed this before (highly unlikely if you’re reading this blog post…. But for the purpose of completeness…) then just Google what the default username and password is for your specific device.
Once you’ve found the IP address of the device you’ve just added, excellent. You now know that the device is on the network;
Understanding the UniFi Controller Architecture
Now what is interesting with Ubiquiti UniFi managed switches is that if you type the IP address of your managed switch into the web browser, nothing happens. Nothing loads. And this is because the Ubiquiti UniFi hardware works differently than the vast majority of other networking hardware in the sense that we configure everything via an external piece of software called the Ubiquiti UniFi Controller. This is a piece of software that lives on a separate device such as your laptop or desktop computer. Here’s what this looks like to visualise how all this interacts;
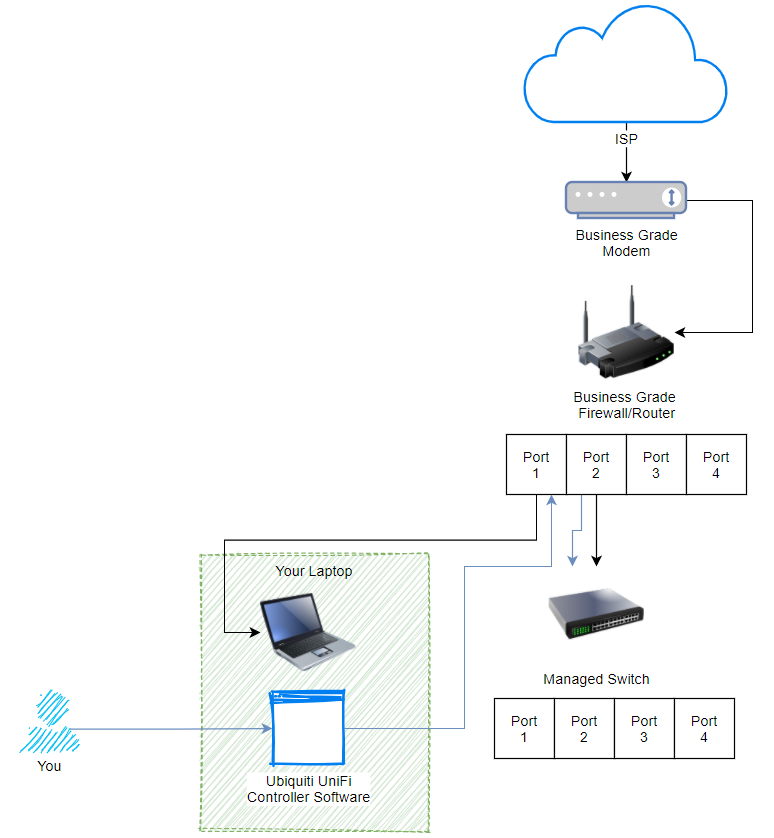
What we are looking at here, the black lines shows how everything is plugged in. The blue lines show how the process works for managing your UniFi managed switch. Pretty cool really, and this architecture of how all this works is one of the reasons that UniFi is completely blowing things away in the market with how there are designing and managing their networking hardware to make your life as easy as possible. Whether you are a small office/home office user or working up towards medium and large sized businesses. The Ubiquiti kit really is amazing.
Install and Open UniFi Controller Software
Ok, so once you’ve downloaded the Ubiquiti UniFi Controller Software and installed it on your computer. Simply run the software (Windows Start Menu > Ubiquiti UniFi > UniFi);
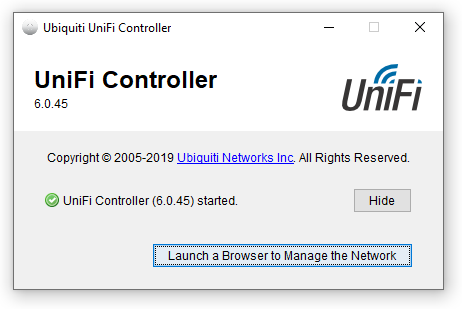
Click the button to launch the site in the browser. If this is the first time you’re doing this, you’re going to need to go through the registration process. The browser will open the URL, https://localhost:8443/manage/account/login. You will get a certificate error but just ignore that if you are on a secure network, which it is highly likely that you will be if you are doing this type of work.
Once the web browser opens you will be presented with a login screen;
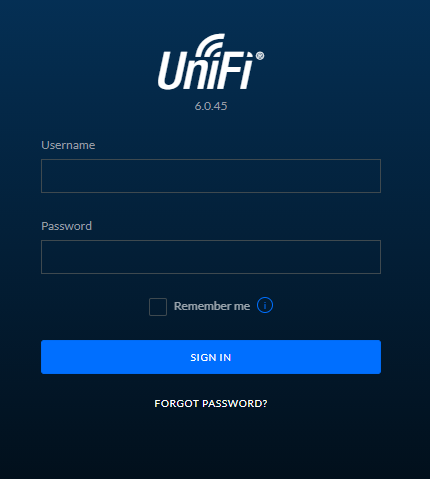
You’ll notice there isn’t a registration button here. If you don’t already have an account then you’ll need to create a Ubiquiti UniFi account here, https://account.ui.com/register. Once you’ve created your account, you will then be able to login to your device. For the purpose of simplicity in this blog post, we are going to assume that you are not using a UniFi Cloud Key. First of all, the UniFi Cloud Keys are an awesome piece of tech that allows you to easily manage your network completely remotely. This comes in extremely handy for IT managed service providers like ourselves who manage the network infrastructure on behalf of clients. We’ll cover that off in a different topic though at a later date.
View Current UniFi Network
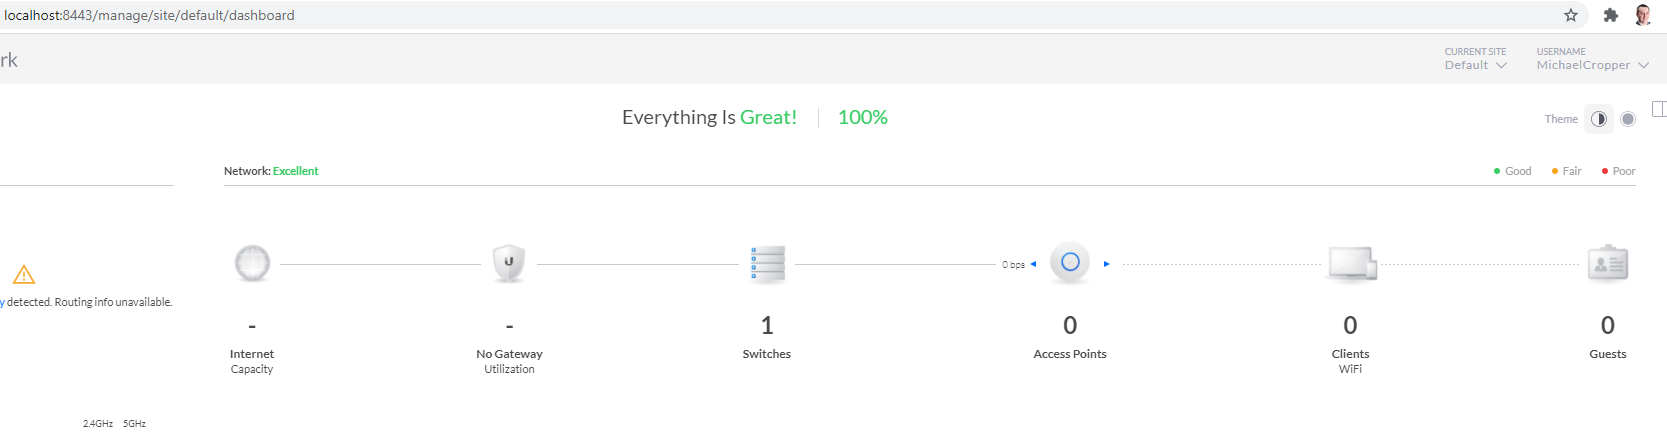
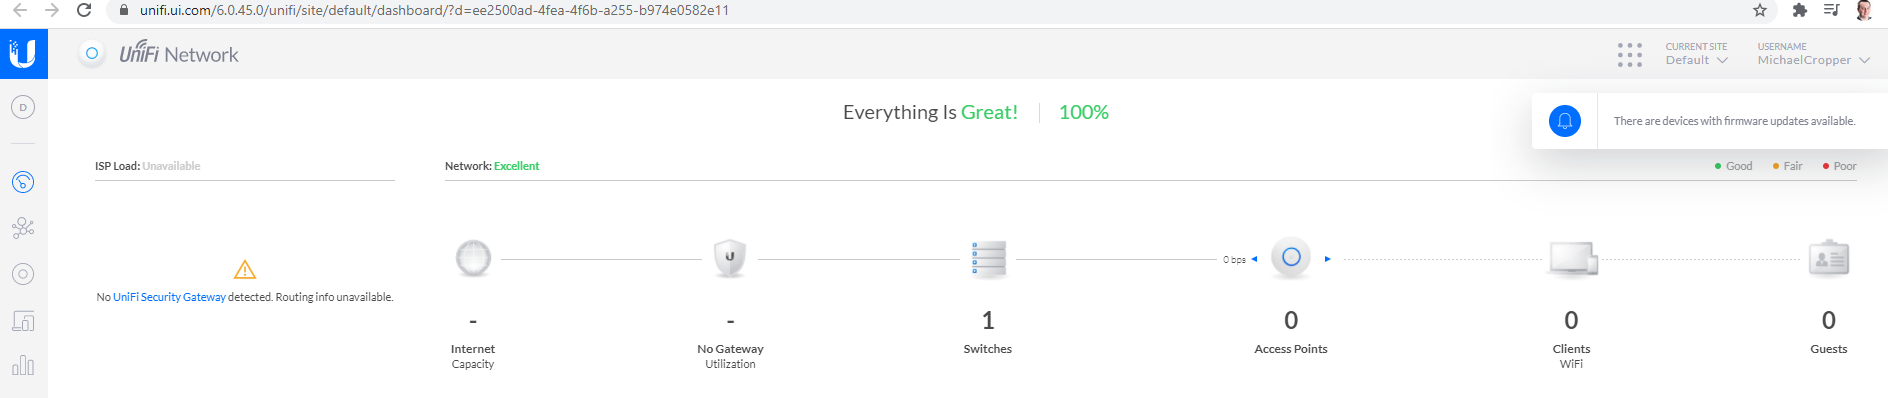
Once you’re logged in you will land on the dashboard;
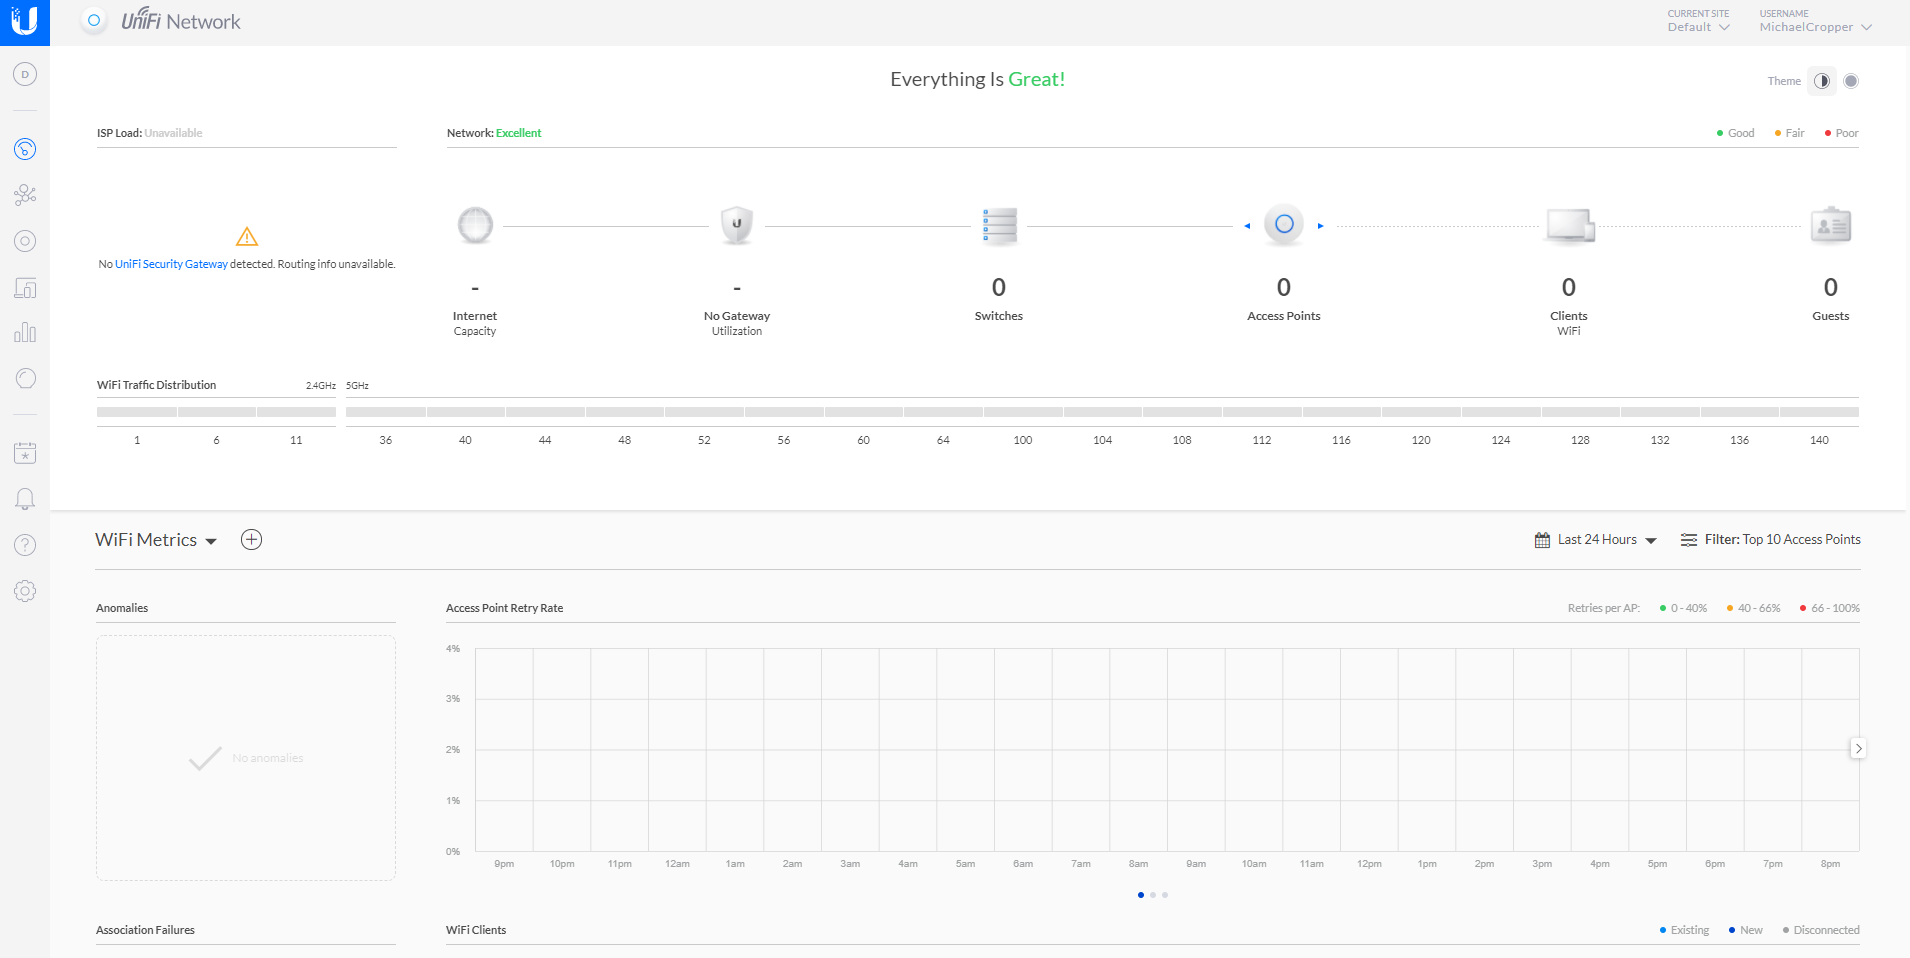
You’ll notice in the picture above that there is nothing there, you have no UniFi devices on your network. Sounds odd at first since you have your UniFi managed switch plugged in, but there is a reason why it is not showing up in your network yet and we’ll look at that now.
Adopt UniFi Managed Switch to Your Network
Firstly, you know you’ve just plugged in a UniFi managed switch into you network, so let’s click on the Switches icon;
![]()
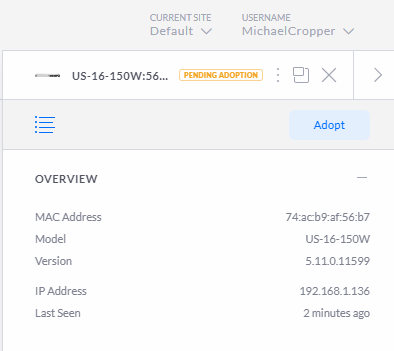
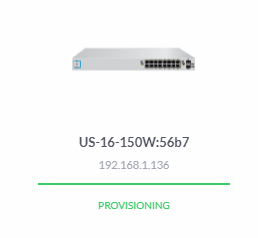
What you’ll notice when you click into that page is that the UniFi managed switch is now showing, but it is showing at the Pending Adoption stage;
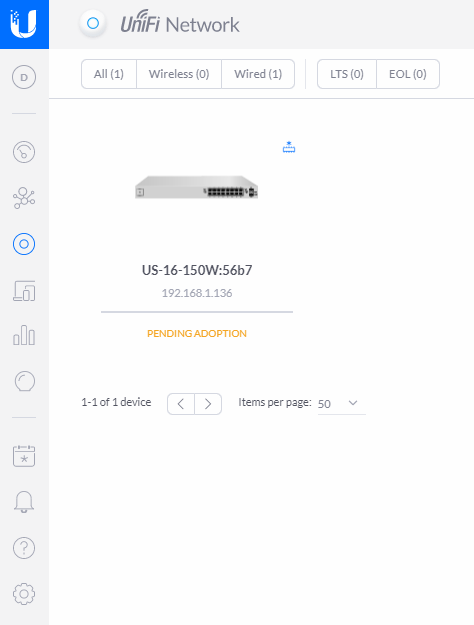
Device Adoption is simply the process of connecting a UniFi device to your UniFi Controller Software so that you can manage it accordingly. You can read more about that here if you are interested. Just before we jump into adopting the device. A couple of nice little features within the UniFi dashboard are worth pointing out. Firstly, the Events button in the left navigation, the one that looks like a calendar icon with an * in the middle. Here you can see the exact date and time you plugged the UniFi managed switch into your network;
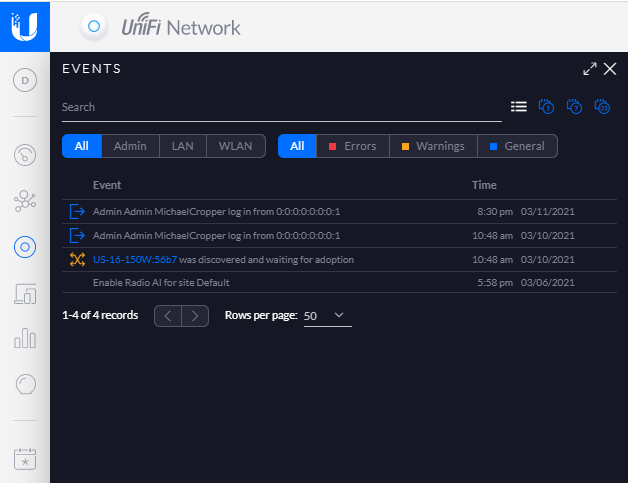
The fact that the software has automatically detected this and logged this event is pretty awesome, particularly for both auditing and debugging purposes. The one of the core benefits of the UniFi Controller Software is to ensure you can’t just go plugging hardware into your network and having that hardware automatically work. The UniFi platform can help to protect you from that attack vector.
So back to the previous image. Click on the managed switch that is pending adoption. You’ll notice a pop out appear;
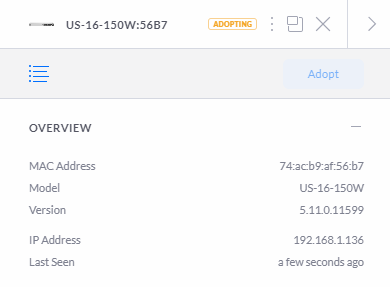
Then you will see that the managed switch moves through to the Adopting stage, this means that the managed switch is being adopted by your UniFi Controller Software so that it can be managed;
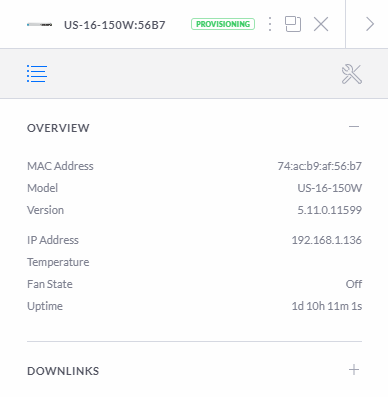
Next you will see the status move through to the Provisioning status. The provisioning status means that the device is in the process of applying updates and/or changes to the configuration and will temporarily reboot so the changes take effect. In this specific example, this makes no real difference as you are just getting setup but in any real world scenario this can result in a momentary blip in the connectivity for your users. Depending on your wider network configuration, you may need to schedule these types of activities to happen at times of low network activity. This is a very difficult thing to balance in corporate environments as you’ll generally find that backups and similar activities are also happening at off-peak times so you really need to fully understand your network and infrastructure architecture at all levels to be able to safely perform these activities. Otherwise, you’re just acting on a “click and hope” mentality. For a single managed switch setup that we’re working through here, this is not really an issue either way. But for larger networks you really need to understand which configuration changes have propagated through to each and every device on the network. If you are getting issues with provisioning configuration settings on specific devices this is really going to screw with your network and cause lots of random problems all over the place.
Once this is complete, you’ll start to see your devices listed as being in the Connected status;
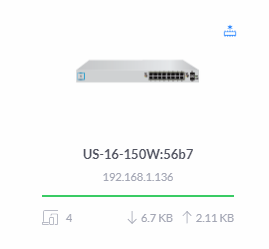
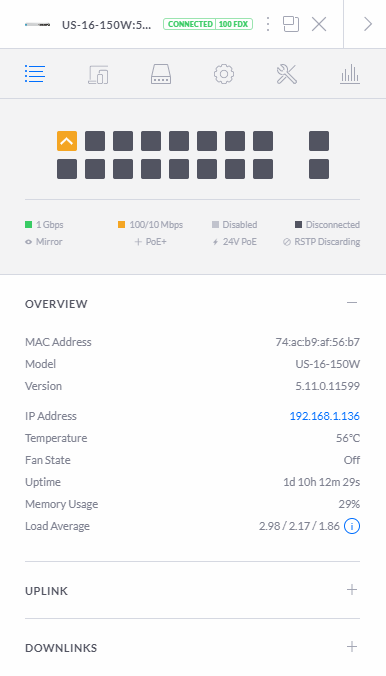
What is interesting in the image above is that you’ll notice that this port diagram exactly represents the port connectivity in the photograph from the very start of this blog posts that shows you how you have connected your physical UniFi managed switch into your network. This is showing you your physically connected ports in a digital view to help you visualise what is currently connected and what availability you have for future planning. While not that relevant for this blog post, it’s worth noting that this is a very handy feature particularly for larger networks spanning multiple geographical locations, knowing what is plugged in where and how this is all configured is extremely valuable so you can plan for future growth and projects as your networking needs expand.
Once you’ve done you’ll notice that your network on your dashboard now looks like the following;
UniFi Cloud Connectivity
What is interesting once you’ve logged into your local UniFi Controller Software locally is that if you view your UniFi account on the UniFi website, you’ll notice the exact same details listed. This is extremely handy to see what is happening on your local network from anywhere in the world. The reality is though is that this functionality is only

In the above image you’ll notice a “Launch” action on the right hand side. What this does is it enables a connection from the UniFi cloud platform straight through to the computer that is running the UniFi Controller Software. Generally these things are powered by the powerful UPnP (Universal Plug and Play) Protocol. I’ve not dug into the details of how this specifically works for the UniFi kit, but I’m going to take an educated guess that it is highly likely that it is UPnP that is powering this functionality. Either way, awesome, as this is a cool piece of tech.
This functionality is basically what the UniFi Cloud Key does, the only difference being that the UniFi Controller Software doesn’t need to be running on your laptop, but instead there is basically a RaspberryPi-like device plugged into the network to perform this feature. The UniFi Cloud Key is actually very similar to how one of the products we’ve designed and built works, the GeezerCloud platform which monitors temperature controlled environments remotely with ease for companies including restaurants and food manufacturing businesses.
Back to looping at the specifics of the UniFi Cloud Platform and how this works though. Once you have clicked on the Launch option, you’ll notice that the UniFi cloud platform is completely aware of your local UniFi network as you have seen in previous images – the only difference is the URL that you are accessing this information from. If you understand what this means, you’ve probably got your eyes raised too as you realise how amazing this feature is. If you don’t understand what this means, add 10+ years to your career and it will sink in why this is so awesome – Apologies on that point but it is difficult at times to convey breakthrough moments in technology like this without understanding the technology stack in a serious way both wide and deep, that stuff only comes with years of experience and knowledge and can’t be easily conveyed in a basic blog post – but – if you have questions, do put them in the comments on this blog post to get the answers you seek.
Back again to once you’ve clicked that Launch button mentioned earlier. What you’ll notice is that once you’ve clicked that, the URL is on the UniFi Cloud Platform, yet it is displaying information from your local network exactly as if you were viewing the information via your locally installed UniFi Controller Software;
All Connected Now Time to Configure
Awesome, now your managed switch is part of your network you are good to start to configure it in the way you like. We’re going to stop this blog post here as the configuration elements of a network can get very detailed so we’ll pick that up in a future blog post.
There are so many different ways to configure your UniFi managed switch that this all depends on the entire network architecture and devices (both UniFi and non-UniFi) that you are working with throughout your network.
Summary
Hopefully this has been a useful insight and tutorial on how to set up a Ubiquiti UniFi managed switch on your network. This guide has been focused on a starting point from nothing, so if you are working with an established network, very similar principles apply, although you’ll need to take extra precaution and understanding of the wider network piece before randomly plugging an additional managed switch into your network.
Michael Cropper
Latest posts by Michael Cropper (see all)
- How to fix “Error establishing a database connection” on WordPress - May 19, 2026
- General Scheme of the Regulation of Artificial Intelligence Bill 2026 - February 4, 2026
- WGET for Windows - April 10, 2025
thanks this has been really helpful
Thanks for sharing the network expertise!
Thanks for sharing this!
merci !