If you have come across this blog post, then like me, you have probably already spent quite a considerable amount of time trying to get this working and scratching your head about why this isn’t working like it should be doing. After finding virtually zero useful and understandable information online about how to do this, I decided to write this blog post to hopefully point you in the right direction now that I’ve managed to figure this out.
A caveat as all technology stacks are completely different. On this example I was running on the following technology stack;
- CentOS6
- Apache Tomcat 7
- cPanel Web Host Manager (WHM)
- cPanel
What I wanted to do is to run servlets on https://sub-domain.example.com.
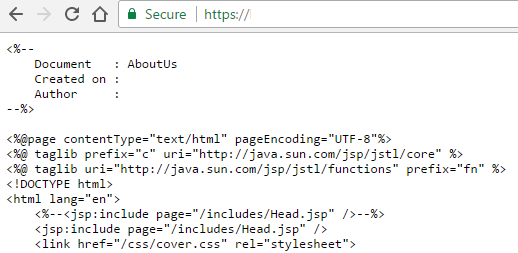
As a quick pointer. If you are looking to setup servlet technologies on a new account, you’ll notice that you can’t simply upload your servlets and JSP files on to a new cPanel account and for it to automatically work. What you’ll find if you have done this is that your JSP files will be accessible directly within the URL and the JSP files will show the JSP information rather than rendering the page correctly;
Usually when adding servlet support to a domain, particularly through WHM, this is a relatively straight forward process where you simply navigate to the following settings page within WHM and install servlets on the domain or account you require that is present within one of the individual cPanel accounts on the server, Home > Account Functions > Install Servlets. Unfortunately this doesn’t work for sub-domains which is a rather annoying ‘feature’ within cPanel WHM which is highlighted in the hidden place within the cPanel Tomcat FAQ which specifically states that;
“You cannot add servlet support to subdomains via WHM. Use the command line to add servlet support to subdomains.”
Ok. Now we know that, let’s get onto how to actually do that. Unfortunately, cPanel haven’t been that useful in actually saying how to go about doing this. In essence though, you need to run the following command at the command line;
cd /usr/local/cpanel/scripts/
And then…
./addservlets2 –domain:sub-domain.example.com
And obviously replacing with the correct domain and sub-domain for where you want to install servlet support, which has been taken from this guide from cPanel, which is also a good reference point should you ever need to remove servlet support for a sub-domain too. What this script does is add the relevant information to the server.xml file which controls what websites on the server can use servlet technology from the single Tomcat instance that is running. Unfortunately yet again, this script doesn’t quite work perfectly. It actually adds in the wrong information in one part of the server.xml file which causes your now should-be-working servlets and JSP pages to throw a 404 error and display a blank screen when you try loading them directly within the browser.
Thankfully, this is relatively simple to fix when you know where to look. First you need to find where your server.xml file is located which will be within either of the following file locations; ${catalina.home}/conf/server.xml or tomcat_installation/conf/server.xml. Again, depending on how everything has been configured, your catalina.home environment variable could be pointing anywhere. So if you run the following command to find the location of catalina.home in the first instance;
ps aux | grep catalina
Often on cPanel setups Catalina home is located at: /usr/local/easy/share/easy-tomcat7/
For those of you who aren’t familiar. The ps command in Linux stands for Process Status and the aux part of the command is actually three commands including a: process all users on the system, u: provide detailed information about each process and x: include processes that have no controlling terminal such as daemons. This handy guide about the ps command is worth a read over. Then by joining this with the grep command which is designed to search the server for specific patterns, this will output the information that you need at the command line. This handy guide covers the grep command for reference.
Once you have run the command above, the output at the command line will tell you where the information has been found. Take a good look through this information and you should be able to spot the directory for catalina.home. In the example I was working on, this ended up being within the following file location;
/usr/local/easy/share/easy-tomcat7/
So next you need to simply navigate to the correct location using the command;
cd /usr/local/easy/share/easy-tomcat7/conf
Where you can then view and edit the server.xml file using the command;
pico server.xml
Find the part of this file where the script you ran earlier has added in this additional information for the sub-domain and you will notice that the data within the <alias> section is wrong, it includes www.sub-domain.example.com rather than sub-domain.example.com. Simply remove the www. part, save the file, restart tomcat in your usual way and you’re good to go. Everything should be working as expected now.
For reference, here is an example. Various data has been blurred out as I can’t show this for obvious reasons, so explainers are below the image.
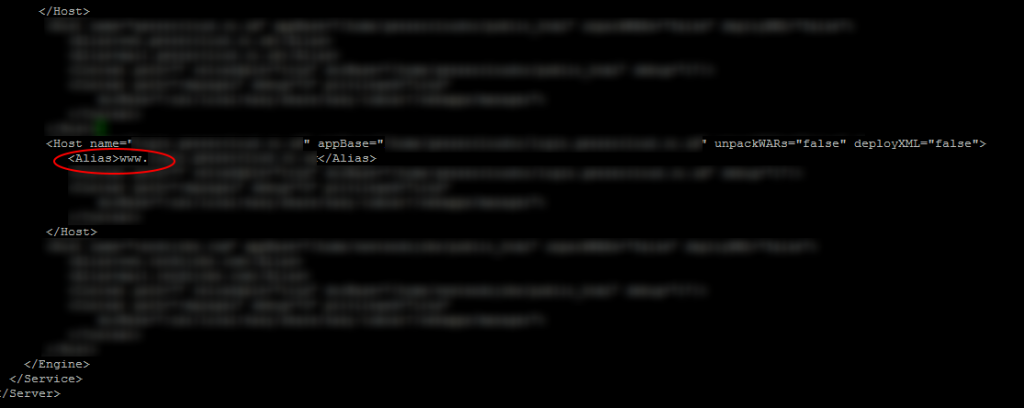
- Host – name: sub-domain.example.com
- Host – appBase: /home/{cPanel User}/{Document Root for Sub Domain}
- Alias – sub-domain.example.com
Next you need to tell Apache to direct requests through Tomcat rather than handling the files itself first. To do this, within your Document Root for the sub-domain, you need to create a .htaccess file if one doesn’t exist already and add the following code to the .htaccess file;
RewriteEngine on

SetHandler jakarta-servlet

SetEnv JK_WORKER_NAME ajp13
All the code above within the .htaccess file relates to Apache Tomcat Connectors. In essence, the two commands mean;
- SetHandler jakarta-servlet forces requests to be handled by mod_jk. If you neither specify any workers via JkMount and the related directives, not via the environment variable described below, the first worker in the list of all worker will be chosen. You can use SetHandler for example in Location blocks or with Apache 2.2 and later also in RewriteRule.
- SetEnv JK_WORKER_NAME ajp13 relates to the Apache Tomcat Connectors AJP Protocol
In essence, this handy guide from cPanel with regards to adding Servlet support which summarises the above .htaccess rules as;
“When war files extract, they extract only in the Tomcat folder and not the user’s /home/username/public_html folder. Because they aren’t extracted there, Apache does not recognize the folder and the application will then only load at http://domain.com:8080/hello (using our prior example) and not at http://domain.com/hello
There has been some confusion that these are not automatically set to extract using our default entry in /usr/local/jakarta/tomcat/conf/server.xml but this is not the case. Our default setup does have these extract into /usr/local/jakarta/tomcat/work/Catalina/domain.com path.
Conversely, they will not show up on Apache under port 80 by default. Revising the server.xml also does not work for these to auto extract nor is that even necessary to do. The way to add servlet support and to get all extracted war files showing up under Apache is by adding these two lines to /home/username/public_html/.htaccess file: (see above)”
So there we have it. That’s how to install servlet support on a subdomain on Apache Tomcat 7 using the command line when you can’t easily do this using cPanel Web Host Manager (WHM). Naturally, don’t go playing round with these kinds of settings if you don’t know what you’re doing and most importantly only use this information as a point of reference for how this solution worked for this specific project. Every server configuration is completely different, so you need to understand your own setup before making high level configuration changes like this as one wrong character where it shouldn’t be can bring down entire websites.
Hope that helps for anyone coming across this similar problem!
Michael Cropper
Latest posts by Michael Cropper (see all)
- How to fix “Error establishing a database connection” on WordPress - May 19, 2026
- General Scheme of the Regulation of Artificial Intelligence Bill 2026 - February 4, 2026
- WGET for Windows - April 10, 2025
My termination is popping out command not found
Sounds painful.
What command are you running and what error are you getting? Context is helpful about what tech stack you are using too.