When you’re building a website from scratch implementing HTTPS is actually relatively straight forward in comparison to migrating a current website from HTTP to HTTPS. When migrating a WordPress website from HTTP to HTTPS there are multiple aspects you need to take into consideration to implement this successfully which are outlined below.
Get an SSL Certificate
This goes without saying, but I’m going to say it anyway. Make sure you have an SSL certificate installed on your domain. There are many options available including the free SSL certificates from Let’s Encrypt. Details outlined for how to get that set up on the linked post.
Update WordPress Address and Site Address in General Settings
Firstly you need to update the settings within Settings > General Settings to update the WordPress Address and Site Address from HTTP to HTTPS as can be seen below.
From HTTP

To HTTPS

This will tell WordPress to use HTTPS throughout the site.
Update Your wp-config.php File for SSL
Add the following line of code to your wp-config.php file which is often needed to ensure SSL works correctly;
if (isset($_SERVER['HTTP_X_FORWARDED_PROTO']) && $_SERVER['HTTP_X_FORWARDED_PROTO'] == 'https'){
$_SERVER['HTTPS'] = 'on';
}
This is required for when your website is behind a load balancer or reverse proxy. Full details about this can be found in the WordPress Codex.
Fix Mixed Content Warnings
Now you’ve successfully set up SSL on your WordPress website, although when you browse the website you may notice that you don’t get the nice green padlock showing in the browser bar. Instead you’ll see lots of mixed content warnings which causes the green padlock not to show;
![]()
The reason this is happening is because some of the assets in use on your page such as images, JavaScript files or CSS files are being loaded over HTTP when the page is HTTPS, meaning that the browser cannot be certain that nothing has been intercepted in transit and edited. Browse the Google Chrome Developer Tools window and you will see notices that look like the following;

This is not quite the desired impact that you had in mind when implementing SSL. Now, assuming that you have a well build website, tidying everything up should actually be relatively straight forward. If your website has been built badly then it’s likely going to be a lot more challenging to fix. For example if URLs have been hardcoded in any of your plugins or themes that are in use.
Update All Assets to Use HTTPS instead of HTTP
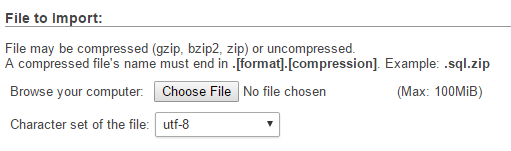
So now you need to run through the database and get everything updated. Thankfully there is a handy plugin which can automate a large amount of this work which is the Search and Replace plugin. Once this is installed go to Tools > Search & Replace > Replace Domain URL tab and enter in your details within here;

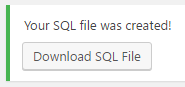
Then you will be able to download a .sql file which has been created for you now the Search and Replace has been completed. From here, login to your web server’s control panel, navigate to phpMyAdmin if you have this installed and upload the SQL file you have just downloaded. Make sure you are uploading this to the correct database if you have multiple databases in use. And as always, make sure you take a backup before you do anything in case you break anything by mistake.
SSL Now Fully Working
Now you have completed all the steps involved with migrating a WordPress website from HTTP to HTTPS and cleaned up all of the mixed content warnings. So when you browse your website now, you should see a nice green padlock when you browse the website. Make sure to have a browse around your website in case anything has been missed. So many WordPress websites have been built badly so you may need to do some additional cleaning up in various places.
![]()
301 Redirect HTTP Traffic to HTTPS
This is just good practice to do so that you are forcing the use of HTTPS on your website. Add the following code to your .htaccess file;
RewriteEngine On
RewriteCond %{SERVER_PORT} 80
RewriteRule ^(.*)$ https://www.example.com/$1 [R,L]
Michael Cropper
Latest posts by Michael Cropper (see all)
- How to fix “Error establishing a database connection” on WordPress - May 19, 2026
- General Scheme of the Regulation of Artificial Intelligence Bill 2026 - February 4, 2026
- WGET for Windows - April 10, 2025